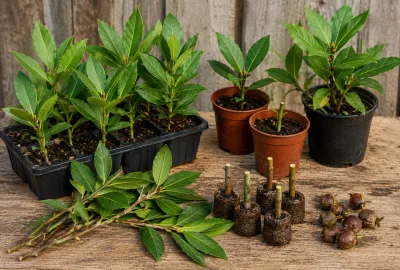
Buy a small pot-grown plant — bay seed is unreliable and takes years to produce a useful plant
Choose a sheltered spot — cold, drying winds cause brown scorch on the leaves even in mild winters
In Scotland and northern England, grow in a large container that can be moved under cover in harsh winters
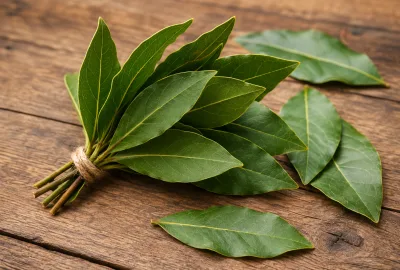
Harvest fresh leaves year-round — the flavour is strongest in summer
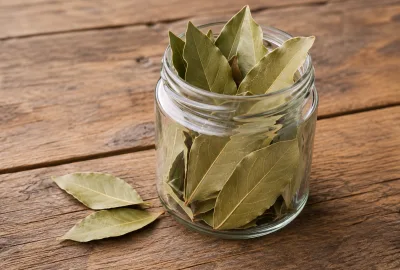
Dried bay leaves have a more classic, mellow flavour than fresh — dry by laying flat away from direct light for 2 weeks
Clip shaped topiary specimens in late spring and late summer with hand shears
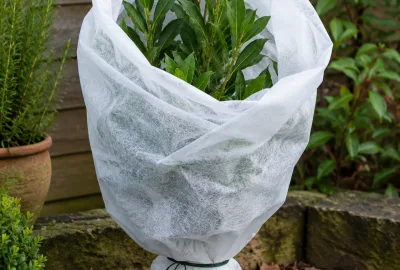
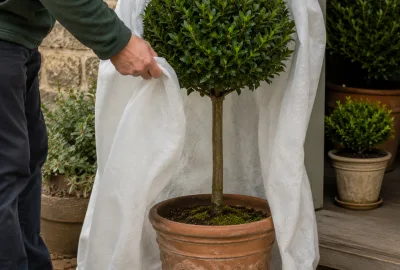
Protect young plants (under 3 years) in their first two winters with fleece or a cold greenhouse
🌱 SowBuy as plant or semi-ripe cuttings Aug–Sep
🌾 HarvestYear-round
☀ PositionFull sun or part shade, sheltered from cold winds
📐 SpacingPot or border — 1.5–4m in open ground
DifficultyEasy
⚡ Quick facts
Difficulty
Easy (once established)
How to get plants
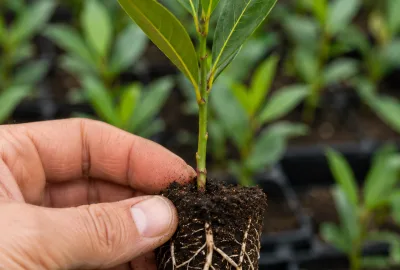
Buy as a pot-grown plant — seed is unreliable and very slow
Propagation
Semi-ripe cuttings Aug–Sep
Harvest
Year-round (best May–Sep)
Position
Full sun or part shade, sheltered from cold winds
Spacing
1.5–4m in open ground · restrict in pot for topiary
Height
3–15m unclipped · 0.6–2m in a container
Type
Hardy evergreen perennial (can be tender when young)
Water
Low once established — drought-tolerant
01 About
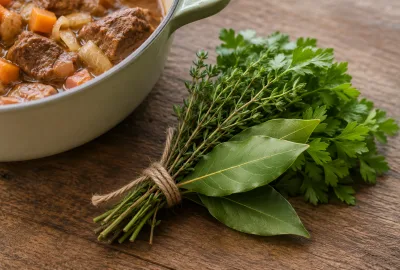
Bay laurel is the indispensable herb of slow cooking — essential in bouquet garni, stocks, casseroles, soups, and custards. A handsome, evergreen shrub or small tree with glossy, aromatic leaves, bay is equally at home clipped into an elegant standard by the front door or growing freely as a border shrub. Once established it is surprisingly tough, provides fresh leaves every single day of the year, and will outlast generations of gardeners. The key is shelter from cold, drying winds and patience in the early years.
02 What to Grow
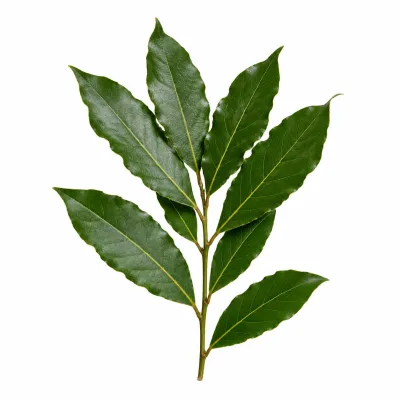
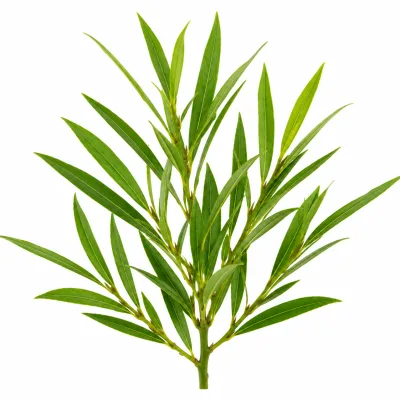
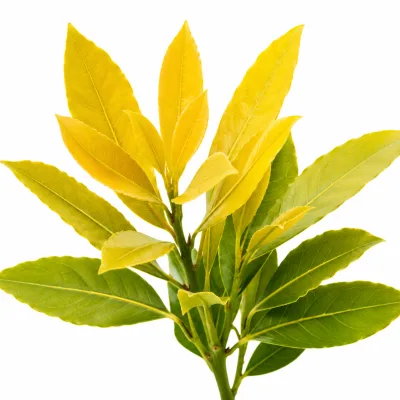
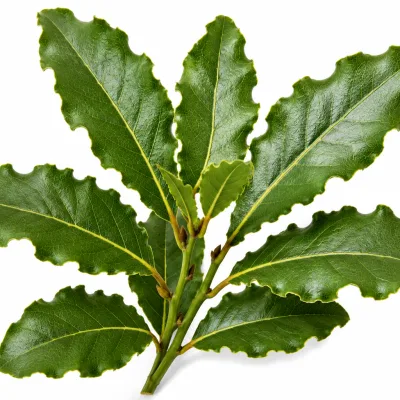
Common bay (Laurus nobilis) is the herb used in cooking — the variety in every garden centre and virtually every British kitchen. Willow-leaved bay has more elegant, narrower leaves and the same culinary properties. Aurea (Golden Bay) offers striking gold-flushed foliage. Crispa has distinctive wavy-edged leaves. Saratoga is a compact, bushy cultivar ideal for containers and small gardens. Laurus azorica (Canary Island Bay) is a related but distinct species with broader, more velvety leaves and a slightly different but still culinary flavour — hardier than sometimes described but best given a sheltered position in cooler UK regions.
03 Varieties
The number of varieties shown for each crop is based on UK consumption data (2025/26) — the more popular the crop, the more variety choices we include.
Common Bay
Culinary · Classic
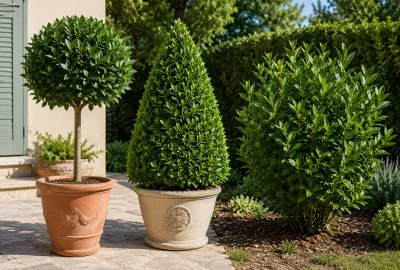
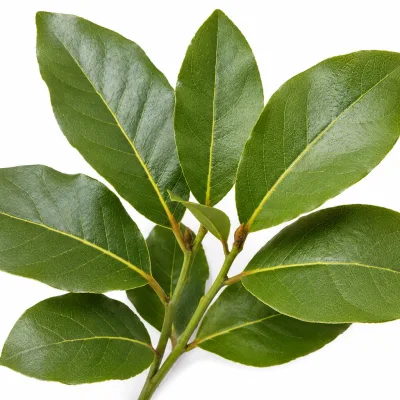
Laurus nobilis. The standard culinary bay grown in virtually all British gardens. Large, glossy, dark green leaves with a warm, aromatic, slightly camphor flavour that is the classic note in bouquet garni, stocks, and slow-cooked dishes. Vigorous and long-lived. Can be clipped into topiary or left to develop as a large shrub or small tree. The essential kitchen herb.
AGM
Willow-Leaved Bay
Culinary · Elegant
Laurus nobilis f. angustifolia. A distinct form with narrower, more slender, willow-like leaves that give it a lighter, more refined appearance than the common species. The culinary properties and flavour are identical. Often used as an ornamental alternative where a more elegant appearance is wanted — as a standard or pyramid it looks particularly fine. Very slightly less cold-hardy than the common form.
AGM
Aurea (Golden Bay)
Ornamental · Culinary
A striking gold-leaved form of Laurus nobilis with leaves that emerge bright gold in spring, softening to yellow-green in summer. Fully culinary — the flavour is the same as common bay. Less vigorous than the species and benefits from a sheltered position as the golden leaves are more susceptible to wind scorch. Outstanding as a clipped topiary specimen where the gold colour provides a dramatic focal point. Plant in a position with morning sun and afternoon shelter for best colour.
AGM
Crispa
Ornamental · Culinary
A distinctive cultivar of Laurus nobilis with attractively wavy, undulating leaf margins that give each leaf a crinkled, frilled appearance. Fully culinary with the same flavour as common bay. The unusual leaf texture makes Crispa particularly interesting as a clipped topiary specimen or as a container plant. Moderate vigour. A conversation-piece plant that combines genuine culinary usefulness with distinctive ornamental character.
Saratoga
Culinary · Compact
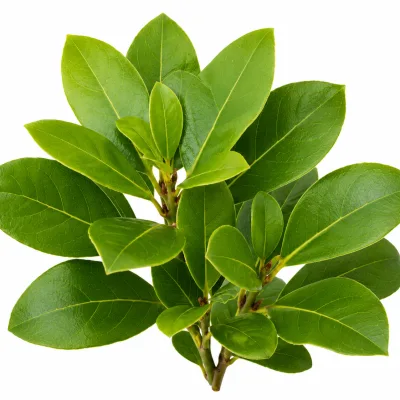
A selected cultivar with a naturally compact, dense, bushy habit that requires less clipping to maintain a good shape than the common species. Particularly well suited to container growing and smaller gardens where the typical species would eventually outgrow the space. Glossy, dark green leaves with the same excellent culinary flavour as common bay. A reliable, manageable form ideal for gardeners who want bay close to the kitchen without the eventual scale of the species.
Laurus azorica
Culinary · Bold · Different Species
Canary Island Bay — a distinct species (not a cultivar of L. nobilis) from the Macaronesian laurel forests. Broader, softer, more velvety leaves than common bay with a slightly different but still fully culinary flavour — more peppery and aromatic. A bold, architectural plant that is hardier than its exotic origins suggest. Best given a sheltered position in northern UK regions. Not interchangeable with common bay in cooking — the flavour difference is noticeable. Excellent for gardens that want something slightly different.
04 Where to Source
Common bay and Aurea are available from most garden centres as container plants year-round. Willow-leaved bay, Crispa, and Saratoga are available from specialist herb and ornamental nurseries. Laurus azorica is best sought from specialist Mediterranean plant nurseries or online suppliers of unusual shrubs. Bay is not reliably grown from seed (germination is erratic and takes 6–12 months) — always buy as a plant. Semi-ripe cuttings taken in August–September root in a heated propagator with bottom heat, though success rates are variable — buy a known variety rather than rely on cuttings for named cultivars.
05 Planting Options
🪴 In a Container
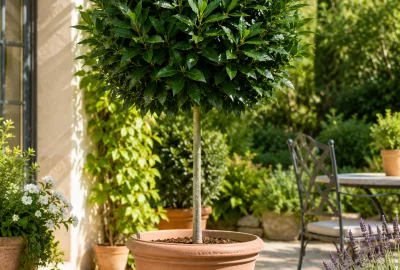
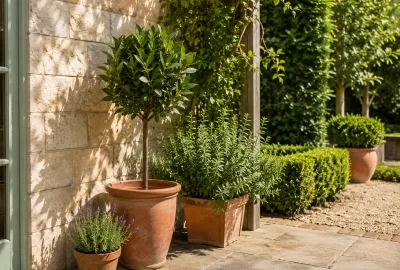
Growing bay in a large container (40–60cm diameter) is the most versatile approach — particularly in cooler regions where the plant can be moved under cover in harsh winters. Container bay responds beautifully to clipping into standards, pyramids, and balls. Use John Innes No. 3 with added horticultural grit. Repot every 2–3 years or top-dress annually with fresh compost.
🌿 In a Sheltered Border
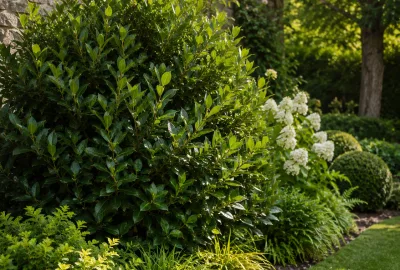
In sheltered gardens in most of the UK, bay grows freely as a large shrub or small tree. Against a south or west-facing wall is ideal — the retained warmth and wind protection suit bay perfectly. In the South and South-West, bay can reach 6m or more and become a significant feature. In Scotland and the North, opt for a container unless you have a very sheltered, warm garden.
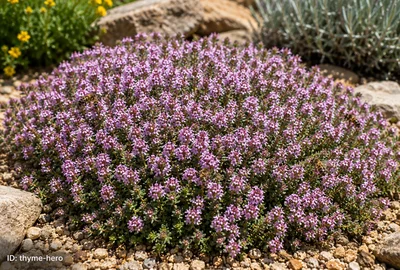
Shares the same free-draining, sunny growing conditions as thyme.
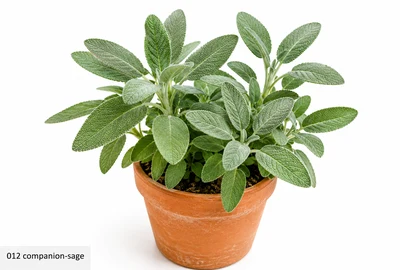
🌿 Sage
A classic Mediterranean herb pairing with matching soil and sun preferences.
❌ Keep apart
🌱 Mint — Mint needs consistently moist soil, unsuited to bay's preference for drier, free-draining conditions, and its spreading roots compete with bay's shallow roots.
🌿 Fennel — Fennel's allelopathic root secretions inhibit the growth of most nearby shrubs and herbs, including bay.
07 Sowing — How To
🪴 From a Bought Plant
Choose the right site
Select a sheltered position in full sun or part shade. Avoid exposed positions where cold, drying winds will scorch the leaves. Against a south or west-facing wall is ideal. In Scotland and northern England, plan to grow in a container that can be moved under cover in the coldest months.
Prepare the planting hole
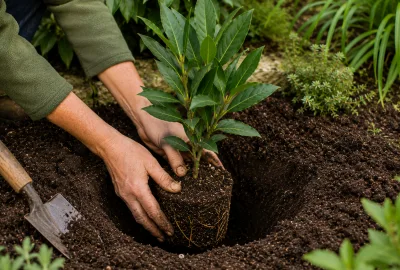
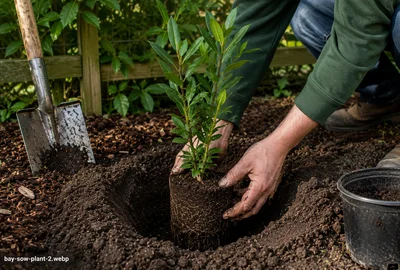
Dig a hole twice the width of the pot and the same depth. Incorporate a small amount of grit if the soil is heavy clay — bay dislikes waterlogging. Do not add excessive compost or fertiliser; bay prefers a modest soil that does not encourage very soft, sappy growth.
Plant at the correct depth
Plant at the same depth as in the pot — do not bury the stem. Firm in well and water thoroughly. Apply a 5cm mulch of bark or compost around the base, keeping it away from the stem, to retain moisture during the establishment period.
Water through the first season
Water regularly through the first growing season, particularly in dry spells, until the plant is clearly established and putting on new growth. Once established (usually after 2 seasons), bay is very drought-tolerant and needs little supplemental watering.
Protect in the first two winters
Young bay plants (under 3 years) are significantly more vulnerable to cold than established specimens. Wrap pot-grown plants in fleece or move under cover in severe weather. Garden-planted bay can be protected with a windbreak fleece or horticultural fleece blanket in prolonged cold snaps.
Begin harvesting in year one
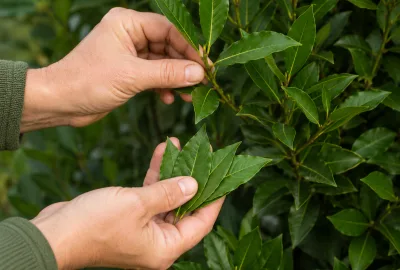
Harvest fresh leaves as needed from the first season — simply pick individual leaves or short sprigs. The more mature the plant, the more leaves it produces. A well-established bay in a sheltered position provides an inexhaustible supply of fresh leaves year-round.
From a Bought Plant — regional timing
Region
Sow / plant
Harvest
Notes
Scotland & Far North
May–Jun
Jan–Dec
N/A · Plant: May–Jun · Harvest: Year-round from year 1
Northern England
Apr–May
Jan–Dec
N/A · Plant: Apr–May · Harvest: Year-round from year 1
Midlands & Wales
Apr–May
Jan–Dec
N/A · Plant: Apr–May · Harvest: Year-round from year 1
Ireland & Isle of Man
Apr–May
Jan–Dec
N/A · Plant: Apr–May · Harvest: Year-round from year 1
South & SE England
Mar–May
Jan–Dec
N/A · Plant: Mar–May · Harvest: Year-round from year 1
South Coast & SW
Mar–Apr
Jan–Dec
N/A · Plant: Mar–Apr · Harvest: Year-round from year 1
✂️ Semi-Ripe Cuttings (Aug–Sep)
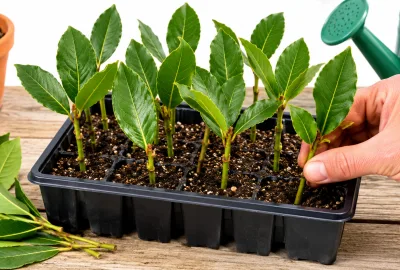
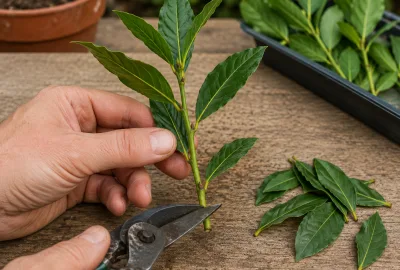
Take semi-ripe cuttings in August–September
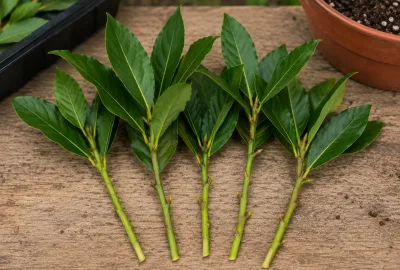
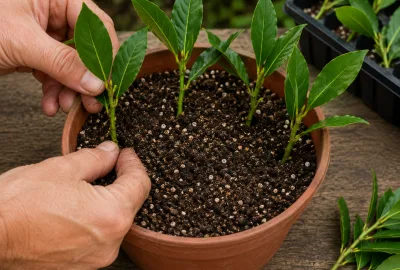
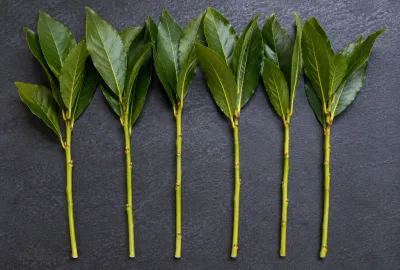
Select 10–12cm shoot tips where the current season growth has begun to firm up but is not yet fully woody — semi-ripe. The stem should be green but slightly resistant when bent. Cut just below a node with clean, sharp secateurs.
Prepare the cuttings
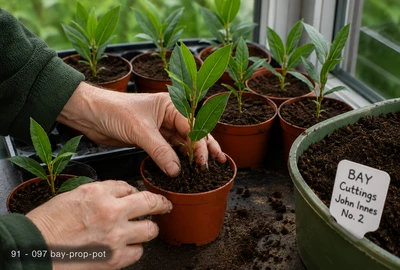
Remove the lower third of leaves from each cutting, leaving 4–6 leaves at the tip. If the remaining leaves are very large, trim them by half to reduce water loss. Dip the cut end in hormone rooting powder or gel — this is particularly helpful for bay which can be slow to root.
Insert in gritty compost with bottom heat
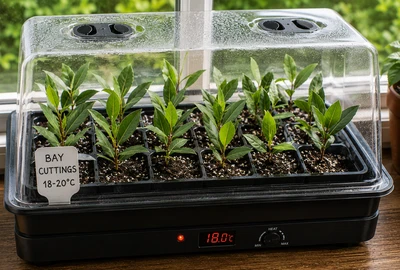
Fill 9cm pots with a 50:50 mix of peat-free compost and horticultural perlite. Insert cuttings to half their length, 4 per pot. Water from below. Place in a heated propagator at 18–20°C — bay cuttings need bottom heat to root reliably.
Maintain humidity and warmth
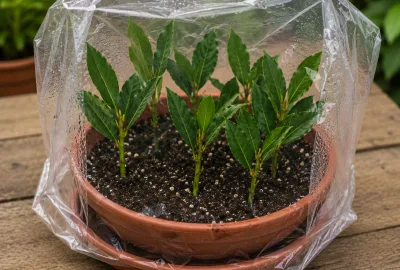
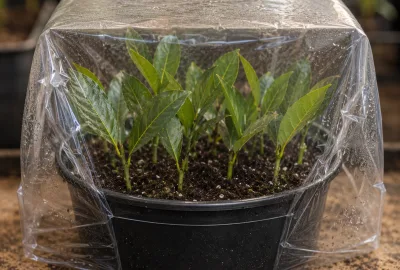
Close the propagator lid or cover pots with clear polythene bags. Keep in the heated propagator at 18–20°C through autumn and winter. Check monthly for rooting by gently tugging — resistance means roots have formed. Bay is slow to root: expect 8–12 weeks minimum.
Pot on when rooted
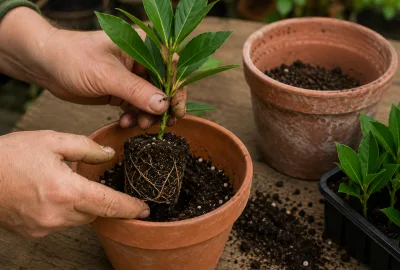
Once rooted, pot individually into 9cm pots of John Innes No. 2. Grow on in a frost-free greenhouse or cold frame through the winter. Do not rush outside — young rooted cuttings are significantly less hardy than established bay plants.
Plant out the following spring
Plant rooted cuttings into their final position or a large container in April–May of the following year. Protect through their first outdoor winter with fleece if needed. Full leaf production begins in year two.
Semi-Ripe Cuttings (Aug–Sep) — regional timing
Region
Sow / plant
Harvest
Notes
Scotland & Far North
Aug
Jan–Dec
Aug · Plant: Following May · Harvest: Year-round from year 2
Northern England
Aug–Sep
Jan–Dec
Aug–Sep · Plant: Following Apr · Harvest: Year-round from year 2
Midlands & Wales
Aug–Sep
Jan–Dec
Aug–Sep · Plant: Following Apr · Harvest: Year-round from year 2
Ireland & Isle of Man
Aug–Sep
Jan–Dec
Aug–Sep · Plant: Following Apr · Harvest: Year-round from year 2
South & SE England
Aug–Sep
Jan–Dec
Aug–Sep · Plant: Following Apr · Harvest: Year-round from year 2
South Coast & SW
Aug–Sep
Jan–Dec
Aug–Sep · Plant: Following Mar · Harvest: Year-round from year 2
08 Using a Propagator
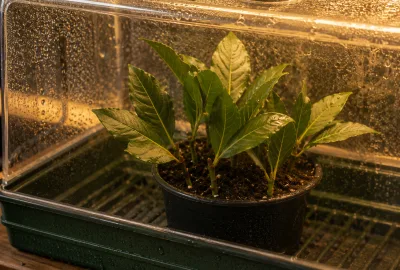
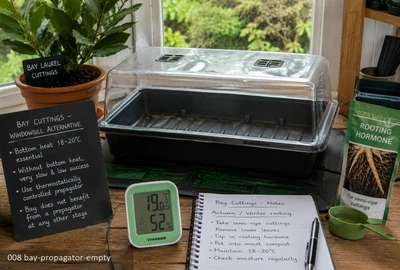
Bay cuttings require a heated propagator to root reliably — bottom heat of 18–20°C is essential through the autumn and winter rooting period. Without bottom heat, bay cuttings root very slowly and at low success rates. A thermostatically controlled propagator set to 18–20°C is the correct tool. Bay does not benefit from a propagator at any other stage of its life cycle.
Heated propagator
Set to 18–20°C for semi-ripe cuttings taken in August–September. Insert cuttings into gritty compost, water in, and maintain humidity with the lid. Bottom heat is essential for bay — without it, rooting rates are very poor.
Temperature: 18–20°C
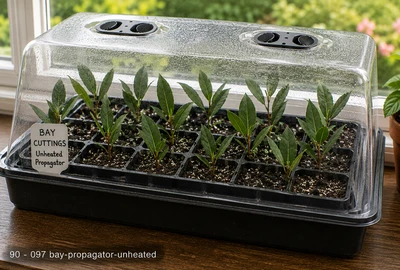
Unheated propagator
Not recommended for bay cuttings. Bottom heat is essential for reliable rooting. An unheated propagator in a cold room will produce very poor results. If no heated propagator is available, take cuttings in August and keep on the warmest possible windowsill.
Standard unheated propagator — A lidded seed tray traps warmth and humidity around germinating seeds without electricity. Performance depends entirely on room temperature — best placed on a warm windowsill and used from March onwards. Replace the lid promptly after watering. Remove it completely the moment seedlings emerge to prevent damping off.
Take semi-ripe cuttings in August
Cut 10–12cm shoot tips where this season growth has begun to firm. Remove lower leaves, retain 4–6 at the tip. Trim large leaves by half. Dip in hormone rooting gel.
Insert in gritty compost
Fill 9cm pots with 50:50 peat-free compost and perlite. Insert cuttings to half their length around the pot edges. Water from below.
Place in heated propagator at 18–20°C
Close the propagator lid. Set to 18–20°C. Position in good light. Bay cuttings are slow — check for rooting after 8 weeks by gently tugging each cutting.
Rooting in 8–16 weeks
Bay roots slowly compared to most herbs. Resistance on gentle tugging confirms rooting. Once 3–4 cuttings per pot have rooted, remove the lid and grow on at 15°C.
Pot individually and overwinter frost-free
Pot rooted cuttings individually into 9cm pots of John Innes No. 2. Overwinter in a frost-free greenhouse or cold frame. Plant out the following April–May.
Windowsill alternative: A bright south-facing windowsill can substitute from late February. Place a clear polythene bag loosely over the pot during germination. Remove immediately once seedlings appear.
💡 Very adaptable to soil type — it tolerates most conditions from slightly acid to alkaline. The one non-negotiable is good drainage; add grit to container compost and avoid damp, poorly-drained ground.
10 Ongoing Care
✂️ Clipping & Shaping
Clip shaped bay specimens (standards, pyramids, balls) twice per year: once in late spring (May–June) as the main growth flush slows, and once in late summer (August–September) to tidy up. Use hand shears for clean cuts. Never cut into old, leafless woody growth — bay does not regenerate from leafless wood. Always clip only into growth that has leaves below the cut. A light clip taken twice per year is far better than a hard prune taken once.
🌡️ Winter Protection
Young bay plants (under 3 years) need protection in hard winters. Wrap container specimens in fleece or move to a cold greenhouse or sheltered porch. In Scotland and northern England, plan to move container bay under cover from November to March. Established garden-planted bay (5+ years) in sheltered positions is generally hardy to -10°C, though the leaves may scorch in prolonged cold winds. Brown, scorched leaves can be removed in spring — the plant almost always recovers.
🌱 Feeding & Repotting
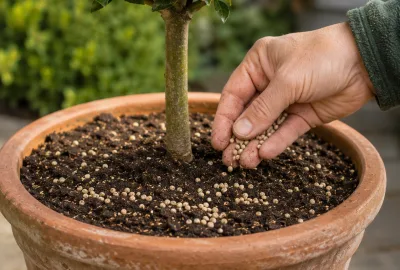
Container bay benefits from a slow-release balanced fertiliser applied in spring and a liquid feed (balanced NPK or seaweed) every 3–4 weeks during the growing season. Garden bay in reasonable soil needs no regular feeding. Repot container bay every 2–3 years into a slightly larger pot in April, using fresh John Innes No. 3. If you do not want the plant to grow larger, root prune — remove the plant, trim the outer root mass by 20%, and replant in the same pot with fresh compost.
11 Watch Out For
Warning
Bay can be slow to recover from severe cold. In harsh winters, protect pot-grown specimens by moving to a cold greenhouse or wrapping with horticultural fleece. Scale insects (brown waxy bumps on stems and leaves) can occasionally colonise bay — remove by hand with a cotton bud dipped in rubbing alcohol, or treat with a systemic plant health product. Check regularly as scale insects establish quietly before becoming obvious.
🐛 Insects & pests
🟤 Scale Insect — Small brown or grey bumps on stems, branches, and the underside of leaves — the scale covers themselves
🌸 Woolly Aphid — White, cotton-wool-like patches on apple bark, branch joints, and wounds — highly distinctive
🤍 Mealybug — White, fluffy or mealy patches in leaf axils, stem joints, and under leaves — the insects themselves
🍄 Diseases to watch
🩶 Botrytis (Grey Mould) — Botrytis cinerea (grey mould) is the most ubiquitous fungal pathogen in temperate gardens — present in virtually every garden soil and on plant debris. It becomes a disease only when conditions favour it: cool, humid, poorly ventilated environments with damaged or senescent plant tissue. In a greenhouse in autumn it can destroy an entire tomato or grape crop.
⬜ Powdery Mildew — Powdery mildew is caused by a range of related fungi, each specific to its host plant — courgette mildew cannot infect peas, and vice versa. The characteristic white powdery coating on leaf surfaces appears in warm, dry conditions (unlike downy mildew which prefers cool and wet). Rarely kills plants but severely reduces yield and plant vigour.
Full identification and treatment advice is in the Pests and Diseases sections.
12 Storage & Preserving
🌿 Fresh (Year-Round)
Bay is evergreen — fresh leaves are available directly from the plant every day of the year. Pick individual leaves as needed. Fresh bay leaves have a stronger, more resinous, slightly bitter character than dried — some dishes benefit from this intensity, while for others dried is preferred. Always bruise or score a fresh bay leaf before using in cooking to release the essential oils. Fresh leaves can be kept wrapped in a damp cloth in the fridge for up to a week.
☀️ Dried (Classic Method)
Dried bay has a milder, more mellow, classic flavour preferred in most slow-cooked dishes — stocks, casseroles, soups, and custards. To dry, lay individual leaves in a single layer on a rack or dry paper away from direct light for 2 weeks until completely papery. Store flat in an airtight container away from light. Dried bay retains good flavour for up to 2 years. Home-dried bay from a well-grown plant is significantly more aromatic than shop-bought dried bay.
🫙 Infused in Cream
Bay infuses beautifully into cream and milk. For bay-infused cream: heat cream with 3–4 fresh or dried bay leaves, allow to cool, refrigerate overnight, strain and use in rice pudding, custard, or panna cotta. Bay-infused cream is one of the most underused flavour techniques in the kitchen — the resulting flavour is subtle, warm, and unmistakably distinctive.
13 Expert Tips
💡 A large, well-established bay clipped as a standard by the front door is one of the most elegant and useful things in the herb garden — ornamental twelve months of the year and providing fresh leaves every day.
💡 Dry Naturally-Shed Leaves
Dry a large batch of leaves in autumn when the plant naturally sheds a few — lay flat on a tray and leave for 2 weeks. A year supply of dried bay costs nothing from your own plant.
💡 Infuse fresh bay into cream or milk for rice pudding and custard — it is one of the most underappreciated flavour combinations in traditional British cooking.