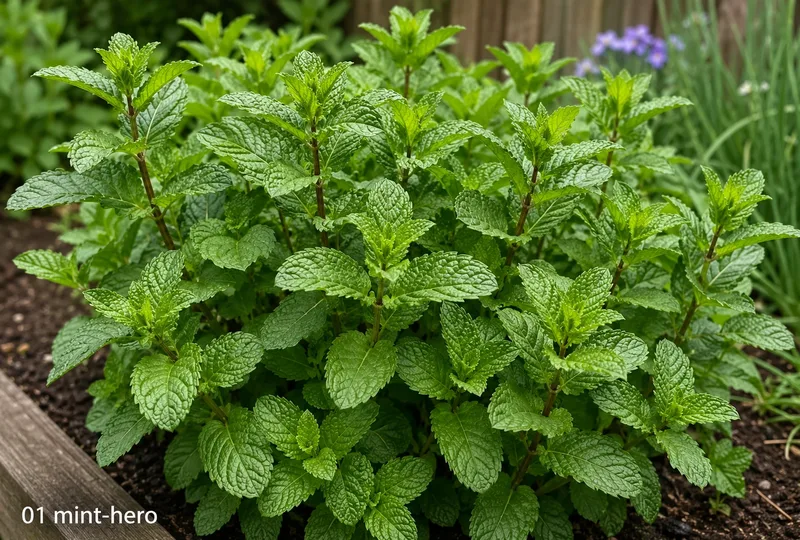
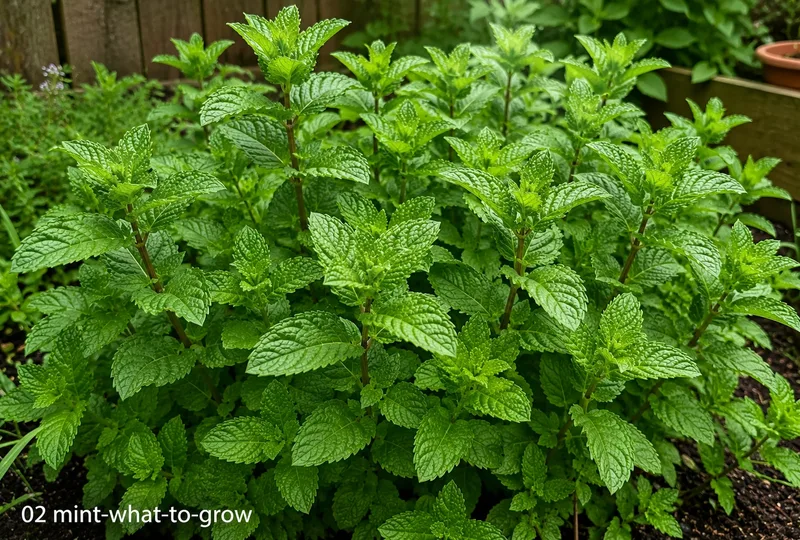
Always grow mint in a container — never directly in open ground
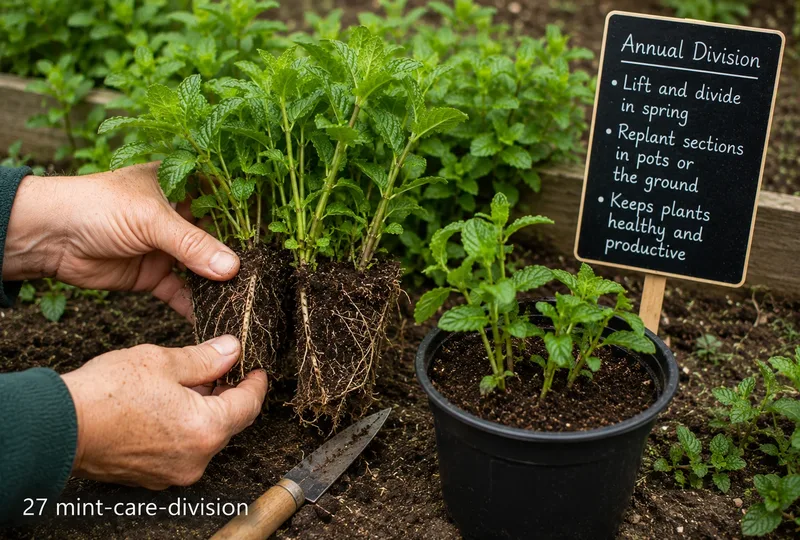
The easiest method is division: split an existing plant in spring and repot
Cuttings root in water in 1–2 weeks — the simplest propagation method in the garden
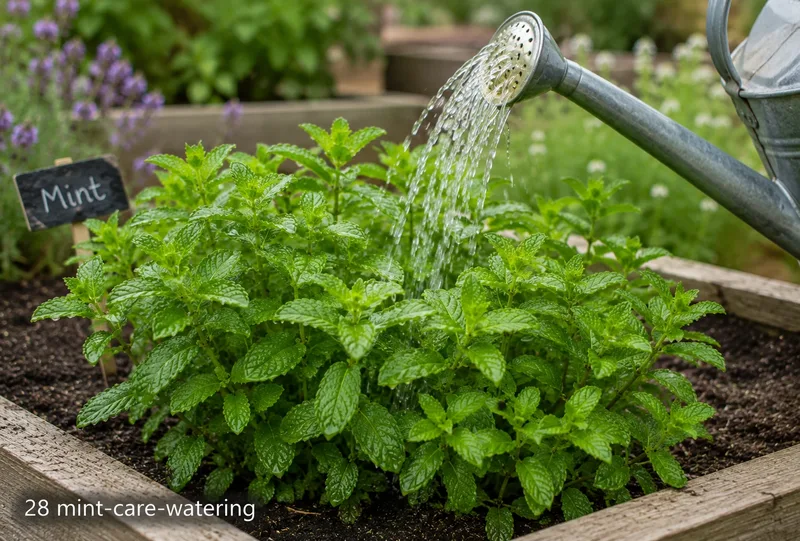
Keep compost consistently moist — mint wilts dramatically when dry
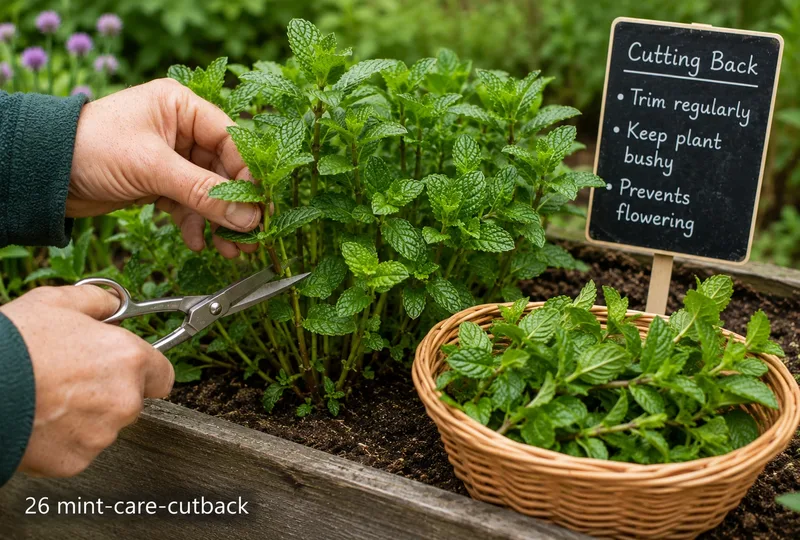
Cut back to the ground after flowering to get a fresh flush of young, flavourful growth
Divide every spring to prevent the plant becoming congested and flavourless
Feed with liquid seaweed every 2–3 weeks for maximum leaf production
🌱 SowDivision or cuttings (Mar–Apr)
🌾 HarvestApr–Oct
☀ PositionSun or part shade, moist soil
📐 SpacingContain in pots
DifficultyEasy
⚡ Quick facts
Difficulty
Easy
Start indoors
Mar–Apr (division or cuttings)
Plant out
Apr–May (once established)
Harvest
Apr–Oct
Position
Sun or part shade
Spacing
Grow in pots — always
Height
30–90cm depending on variety
Type
Hardy perennial
Water
High — keep consistently moist
01 About
Mint is one of the most rewarding herbs you can grow — fast, generous, nearly indestructible, and astonishingly varied in flavour. The rule is simple: always grow it in a container. Left to its own devices in open soil, mint will spread by underground runners and colonise your entire plot within two seasons. Contained in a pot, it is magnificent: fragrant, productive, and available from April right through to October's first frosts.
02 What to Grow
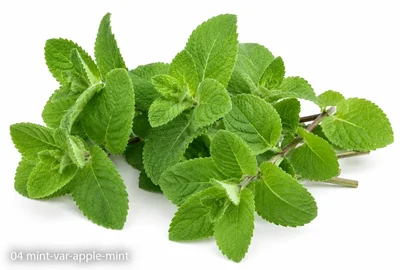
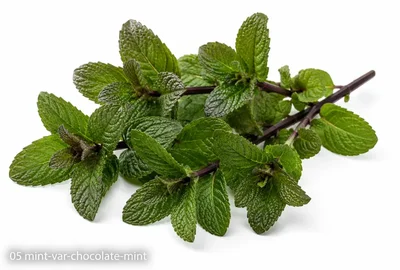
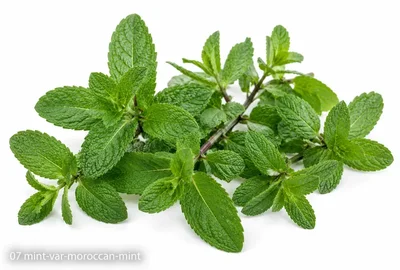
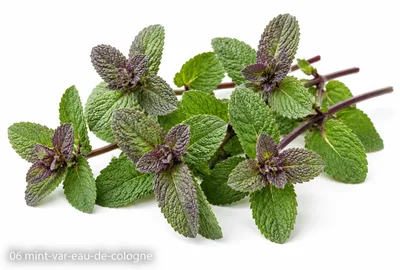
Mint is far more varied than most gardeners realise. Beyond the familiar spearmint of mint sauce lies a whole world of flavour — the clean menthol punch of peppermint perfect for tea, the soft warmth of apple mint that makes the best mojitos, the intriguing chocolate-vanilla note of chocolate mint for desserts, the intense freshness of Moroccan mint for authentic North African tea, and the unusual floral quality of eau de cologne mint for tisanes and garnishes. Growing several varieties side by side is one of the most enjoyable things you can do in a small herb garden.
03 Varieties
The number of varieties shown for each crop is based on UK consumption data (2025/26) — the more popular the crop, the more variety choices we include.
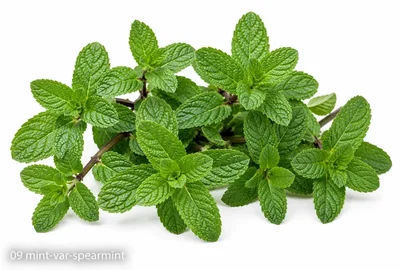
Spearmint
Culinary · Classic
The most widely grown and versatile culinary mint. Clean, fresh flavour with a medium menthol note. The correct mint for mint sauce, new potatoes, and peas. Vigorous and reliably productive. The default choice if growing only one variety.
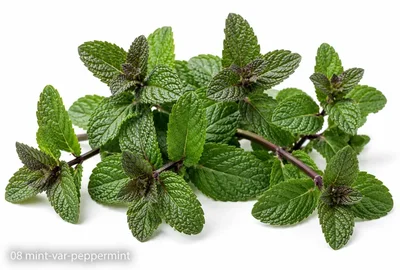
Peppermint
Culinary · Tea
Intense, cooling menthol flavour — much stronger than spearmint. Best used in herbal teas, hot drinks, and confectionery. A natural hybrid between watermint and spearmint. The leaves are darker and the stems often have a purple tinge. Do not use raw in salads — the flavour overwhelms.
Apple Mint
Culinary · Drinks
Soft, woolly leaves with a mild, rounded flavour that suggests apple and mint together. The classic mint for mojitos and summer cocktails. Less pungent than spearmint, making it versatile in fruit salads and desserts. Very vigorous — one of the most productive varieties.
Chocolate Mint
Culinary · Desserts
A peppermint variety with a subtle, warm chocolate-vanilla undertone. Excellent in hot chocolate, desserts, and ice cream. The leaves have dark stems and a slightly darker green colour than standard peppermint. A novelty variety that genuinely delivers on its promise.
Moroccan Mint
Culinary · Tea
The authentic mint of North African cuisine and the traditional mint tea of Morocco. Intensely sweet and fresh, with a high menthol content but a smooth rather than sharp quality. Excellent fresh in teas, salads, and tagines. Less vigorous than spearmint — benefits from a slightly sheltered spot.
Eau de Cologne Mint
Aromatic · Drinks
Named for its remarkable floral, citrusy fragrance that resembles cologne rather than standard mint. The leaves have a purple tinge and the flavour is complex and unusual — excellent in tisanes, cocktails, and as a garnish. More ornamental than culinary, but a fascinating addition to any herb garden.
04 Where to Source
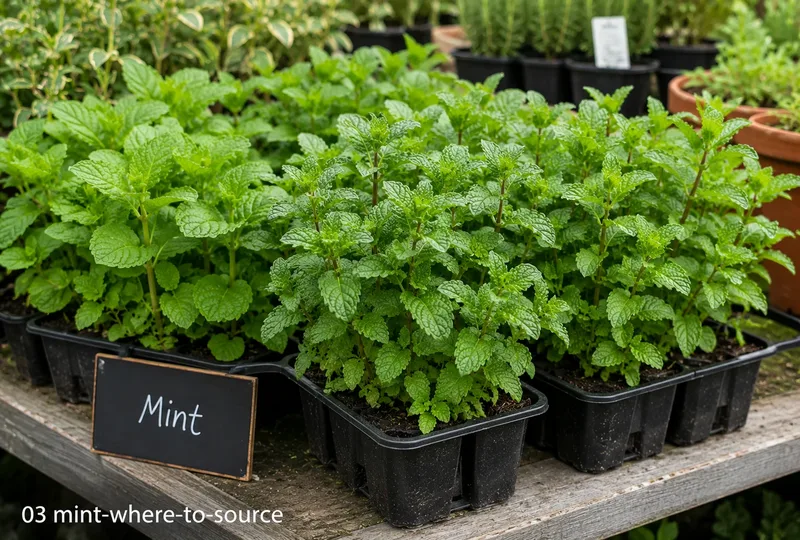
Spearmint and peppermint are available as plants from virtually all garden centres from spring onwards. Apple mint, Moroccan mint, and chocolate mint are widely stocked by herb specialists and many online suppliers. Eau de Cologne mint is best sought from specialist herb nurseries. Avoid growing mint from seed — it rarely comes true to type and the results are often inferior flavourless plants. Always buy or obtain named varieties as divisions or cuttings from a reliable source.
05 Planting Options
🪴 Sunken Pot in the Garden
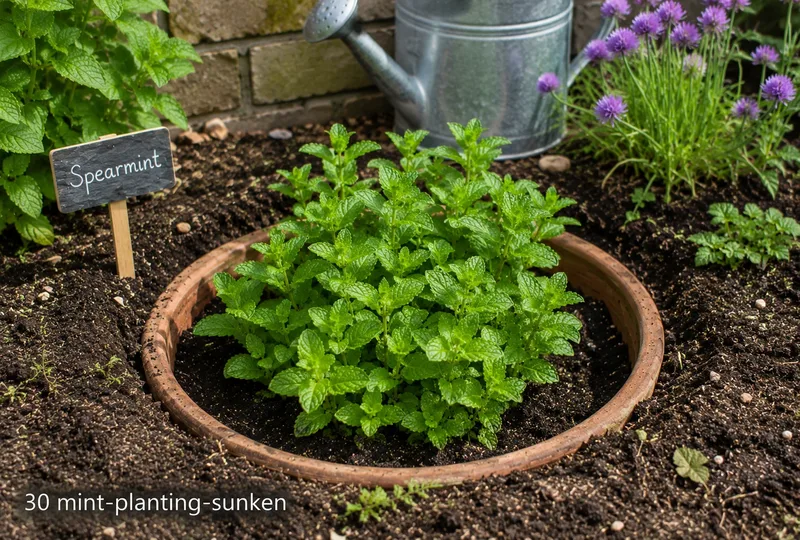
The best of both worlds. Sink a large pot (30–45cm diameter) into the garden border up to its rim. Mint grows as if in the ground but roots cannot escape. This method looks natural, retains moisture better than a free-standing pot, and prevents the plant drying out as fast in summer heat.
🌿 Container on Patio or Windowsill
Free-standing containers are ideal for patios and balconies where sinking a pot is not possible. Use a large container (minimum 30cm) with good drainage holes. Mint in containers dries out faster — check moisture daily in summer. Moving the pot to part shade in the hottest part of summer reduces water stress.
Both are easy-going companions that tolerate similar moist, part-shaded conditions.
❌ Keep apart
🌼 Chamomile — Mint's vigorous spreading roots will quickly overrun chamomile's shallow root system if not contained.
🌱 Parsley — Mint's invasive runners will crowd out and smother slower-growing parsley within a single season.
07 Sowing — How To
🌱 Division (Recommended)
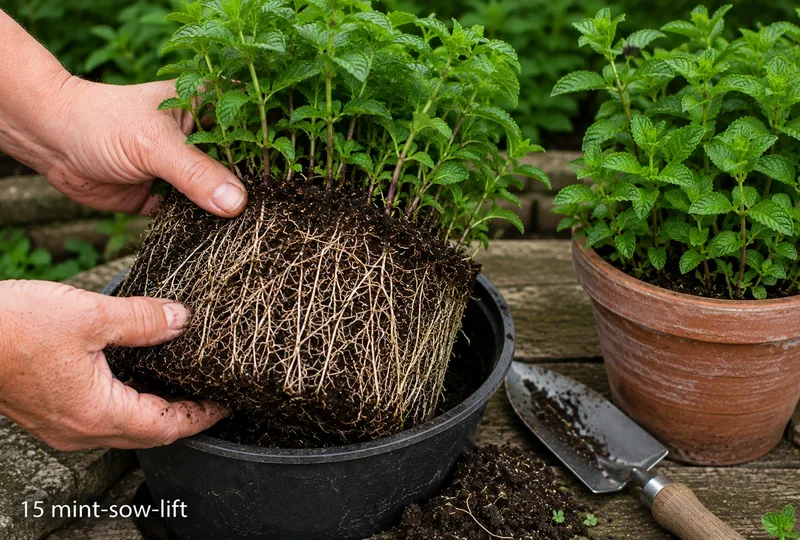
Lift the root mass
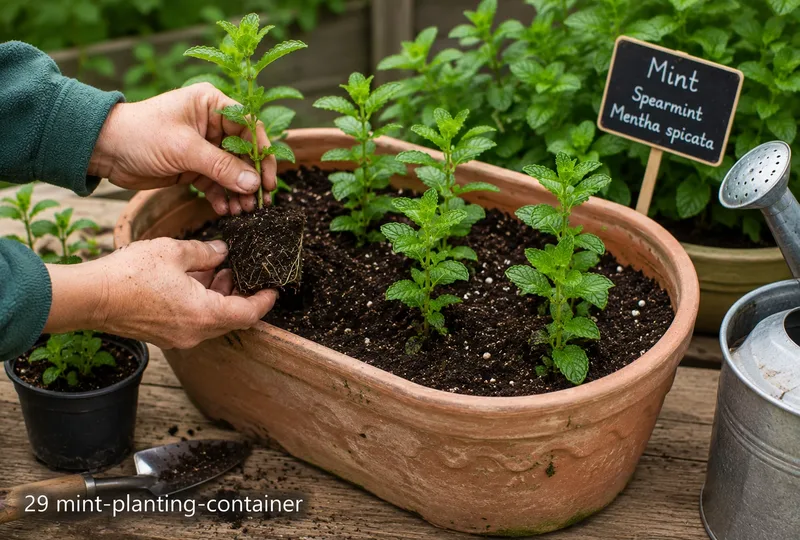
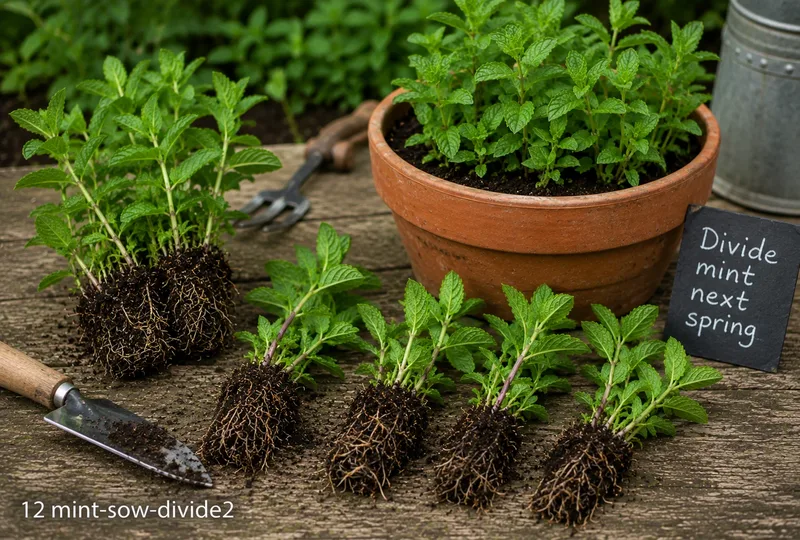
In early spring as new growth appears, tip the pot or lift the clump from the ground. The root mass will be a dense tangle of white runners — this is healthy and normal. One large clump can yield 4–6 new plants.
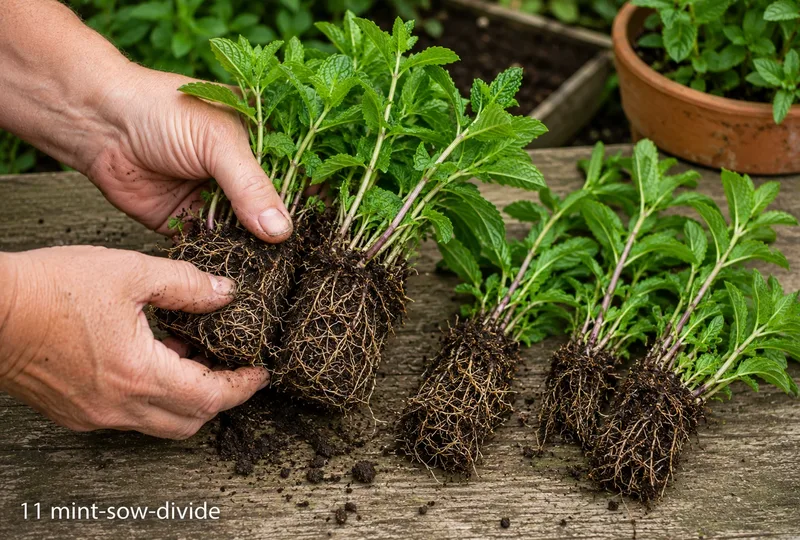
Pull apart into sections
Pull the root mass apart by hand into sections, each with several shoots and a good section of root. Discard any dead or brown woody central material — the vigorous young runners at the edges are the most productive.
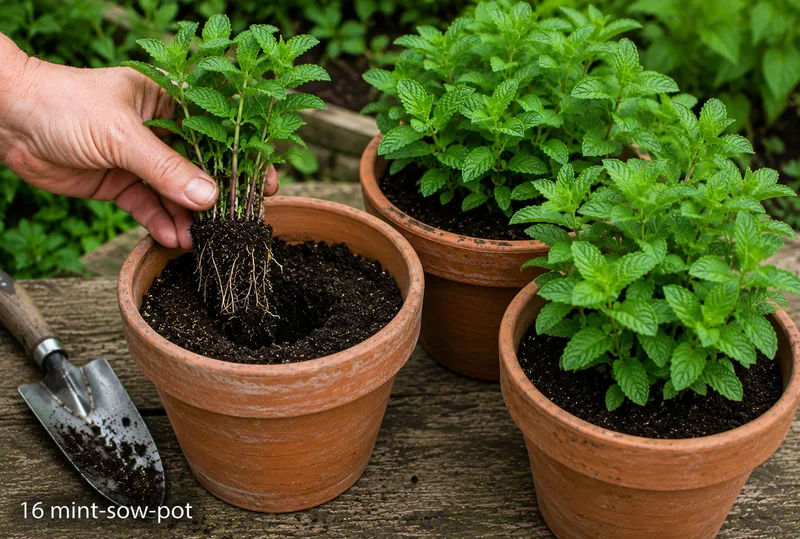
Pot into fresh compost
Plant each section into a pot of fresh peat-free multi-purpose compost, burying the runners just below the surface. One division per 20cm pot, or 2–3 per 30cm pot. Firm in well and water thoroughly.
Water and shelter for 2 weeks
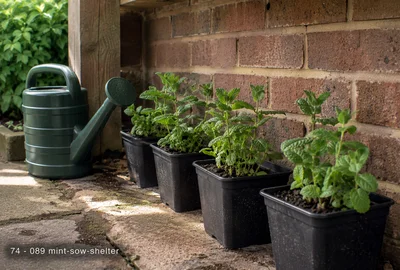
Keep newly potted divisions in a sheltered spot out of direct wind for 2 weeks while they re-establish. Water freely — never let mint dry out at this stage. New shoots will appear within a week of dividing.
Begin harvesting
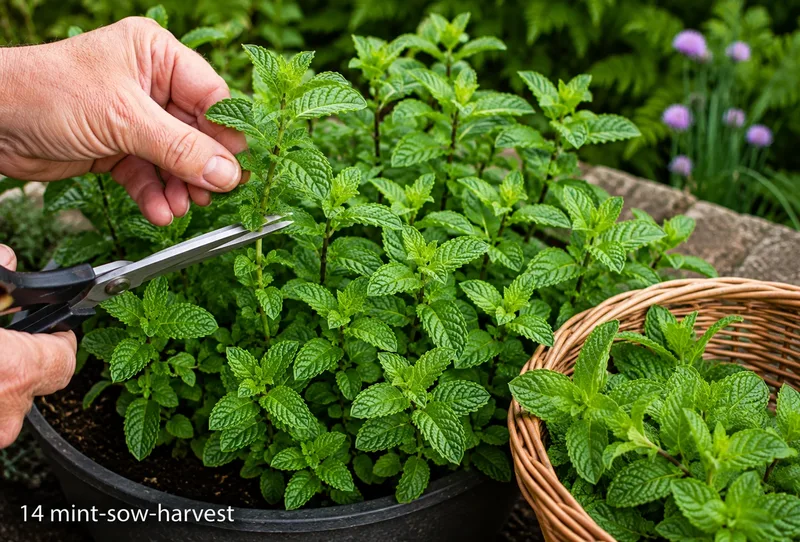
Once plants are growing strongly (usually within 2–3 weeks), begin harvesting stem tips. Always cut just above a pair of leaves to encourage branching. The more you pick, the more the plant produces.
Divide again next spring
Repeat the division process each spring before growth becomes too congested. Regular division keeps mint vigorous, flavourful, and free of the woody, tasteless growth that older plants develop.
Division (Recommended) — regional timing
Region
Sow / plant
Harvest
Notes
Scotland & Far North
Apr–May
May–Oct
Apr · Plant: Apr–May · Harvest: May–Oct
Northern England
Mar–Apr
Apr–Oct
Mar–Apr · Plant: Apr · Harvest: Apr–Oct
Midlands & Wales
Mar–Apr
Apr–Oct
Mar–Apr · Plant: Apr · Harvest: Apr–Oct
Ireland & Isle of Man
Mar–Apr
Apr–Oct
Mar–Apr · Plant: Apr · Harvest: Apr–Oct
South & SE England
Mar–Apr
Apr–Oct
Mar · Plant: Mar–Apr · Harvest: Apr–Oct
South Coast & SW
Mar–Apr
Apr–Oct
Mar · Plant: Mar–Apr · Harvest: Apr–Oct
✂️ From Stem Cuttings
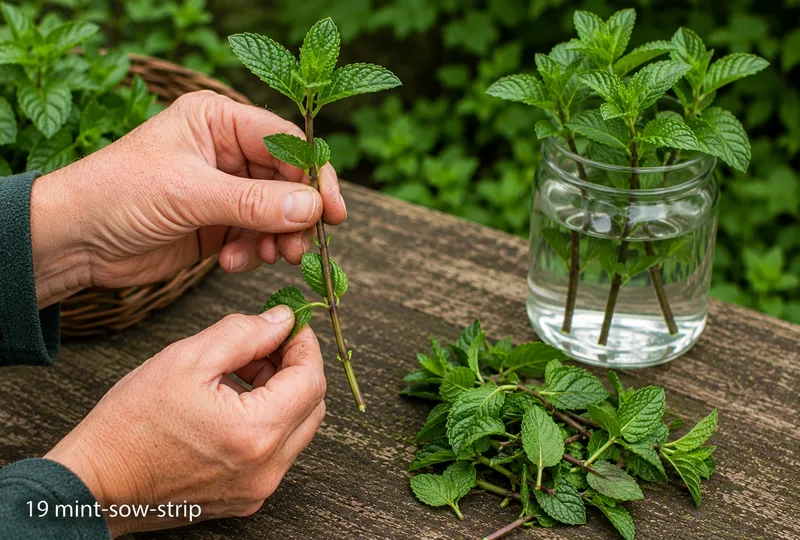
Take stem cuttings
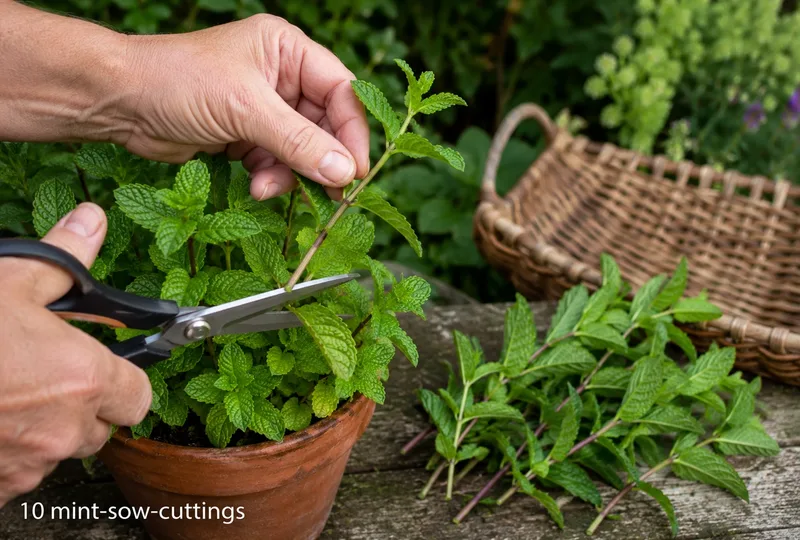
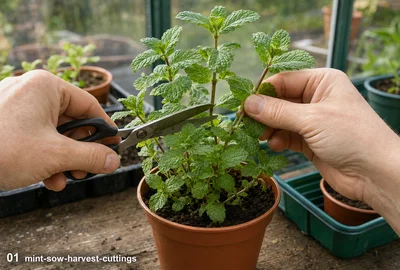
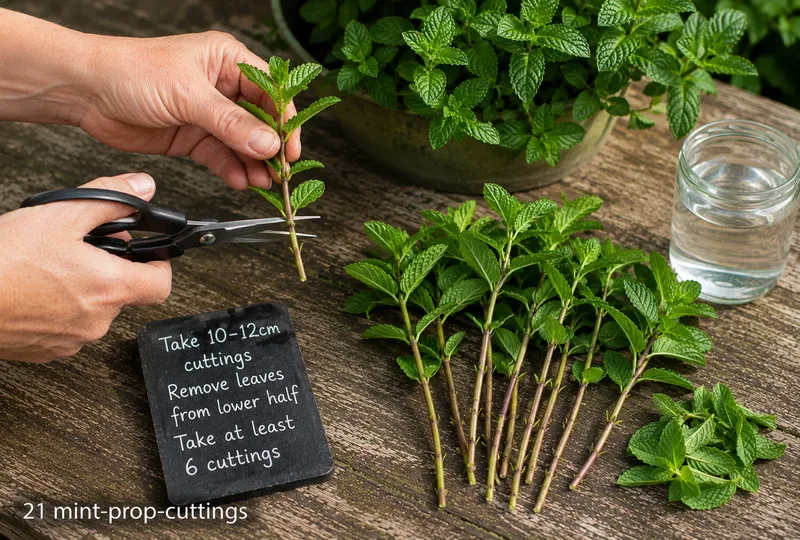
Cut 10–12cm stem tips just below a node. Take several cuttings — mint roots so easily that there is no reason to take fewer than 6 at a time. Use clean scissors or secateurs.
Remove lower leaves
Strip all leaves from the lower two-thirds of each cutting, leaving just 4–5 leaves at the tip. This prevents rotting in the water or compost and directs energy into root production.
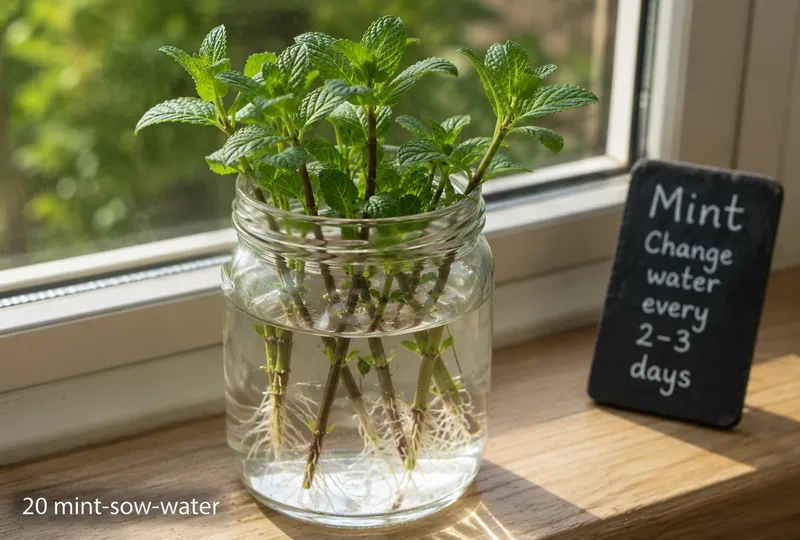
Root in water
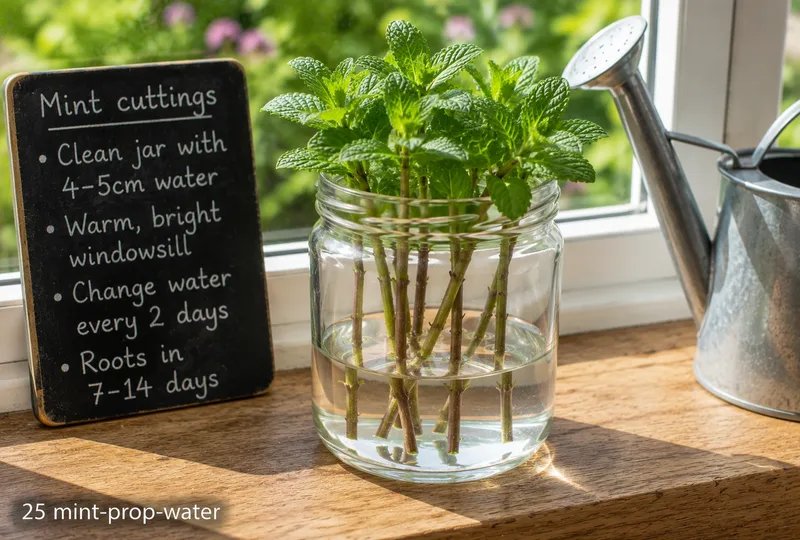
Stand the stripped cuttings in a jar of clean water on a warm, bright windowsill. Change the water every 2–3 days. Roots appear in 7–14 days — mint is one of the fastest-rooting herbs.
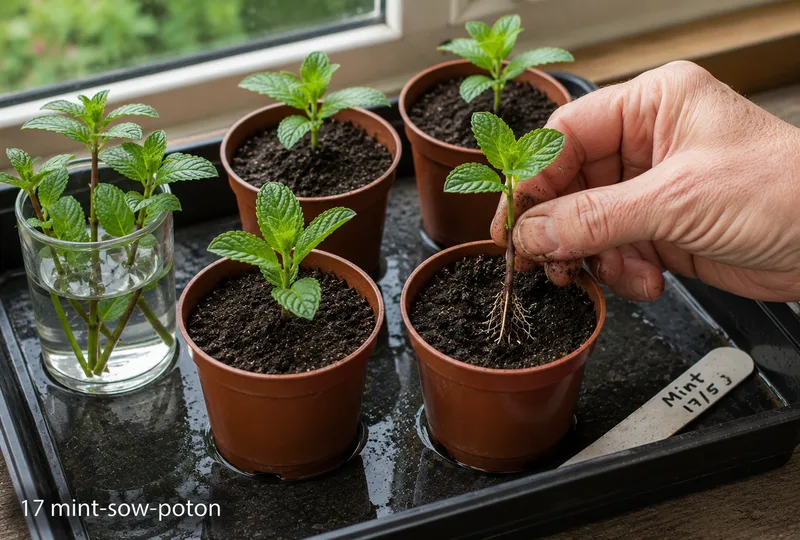
Pot on when roots are 2cm
Once roots are 2–3cm long, pot cuttings individually into peat-free multi-purpose compost. Plant so the stripped section is below soil level. Water from below and keep on a warm windowsill for one week.
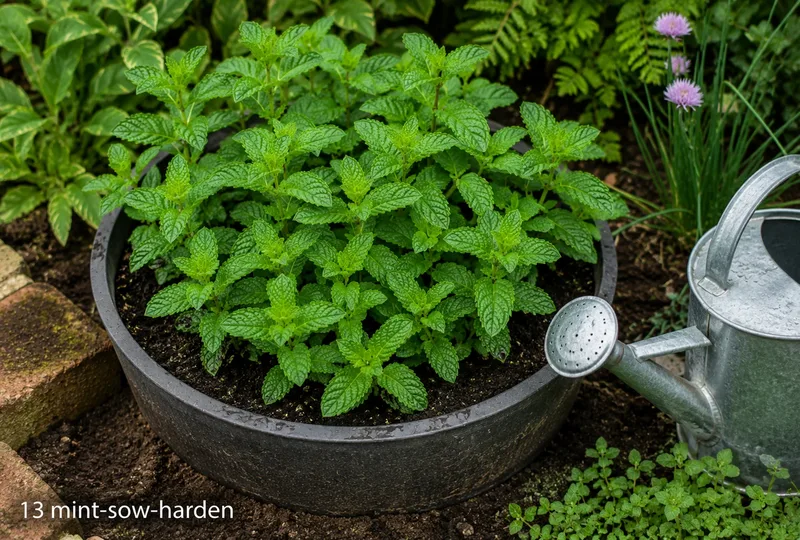
Harden off and move to final position
After one week indoors, begin moving pots to their final position outdoors — a sheltered patio or sunken container in a border. Water freely in the first two weeks.
First harvest after 3–4 weeks
Begin harvesting once the plant is growing vigorously and has put on at least 5cm of new growth. Always cut stem tips — never strip leaves from the middle of a stem.
From Stem Cuttings — regional timing
Region
Sow / plant
Harvest
Notes
Scotland & Far North
May–Jul
Jul–Oct
May–Jun · Plant: Jun–Jul · Harvest: Jul–Oct
Northern England
Apr–Jul
Jun–Oct
Apr–Jun · Plant: May–Jul · Harvest: Jun–Oct
Midlands & Wales
Apr–Jul
Jun–Oct
Apr–Jun · Plant: May–Jul · Harvest: Jun–Oct
Ireland & Isle of Man
Apr–Jul
Jun–Oct
Apr–Jun · Plant: May–Jul · Harvest: Jun–Oct
South & SE England
Apr–Jun
May–Oct
Apr–Jun · Plant: May–Jun · Harvest: May–Oct
South Coast & SW
Mar–Jun
May–Oct
Mar–Jun · Plant: Apr–Jun · Harvest: May–Oct
08 Using a Propagator
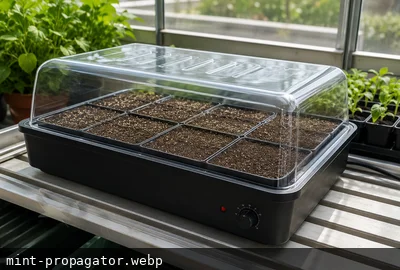
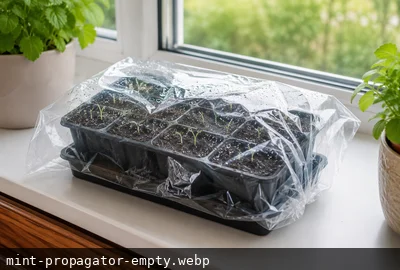
Mint does not need a heated propagator — it roots readily in water at room temperature. A propagator is useful only for very early spring cuttings (February–March) when windowsill temperatures may dip below 15°C overnight. In those conditions, placing the jar of cuttings inside an unheated propagator adds useful thermal insulation.
Unheated propagator
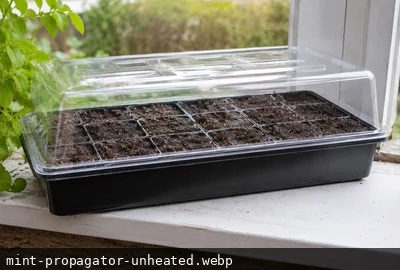
An unheated propagator provides useful insulation for early spring cuttings in cold rooms. Place the jar of cuttings inside and close the lid overnight. Remove during the day to allow light and air circulation. From April onwards no cover is needed.
Standard unheated propagator — A lidded seed tray traps warmth and humidity around germinating seeds without electricity. Performance depends entirely on room temperature — best placed on a warm windowsill and used from March onwards. Replace the lid promptly after watering. Remove it completely the moment seedlings emerge to prevent damping off.
Take stem tip cuttings
Cut 10–12cm stem tips just below a leaf node. Remove all leaves from the lower half. Take at least 6 cuttings at once — mint rooting success is close to 100% so more cuttings simply means more plants.
Root in a jar of water
Place stripped cuttings in a clean glass jar with 4–5cm of clean water. Stand on a warm, bright windowsill. Change the water every 2 days to prevent bacterial build-up.
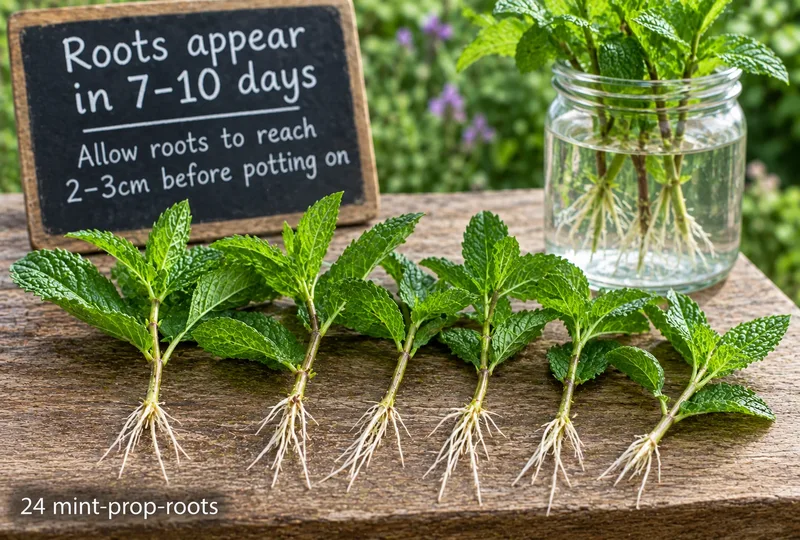
Roots appear in 7–10 days
White roots emerge from the cut end within a week. Allow roots to reach 2–3cm before potting on. Do not leave in water indefinitely — water roots and soil roots are different structures and very long water roots struggle to adapt.
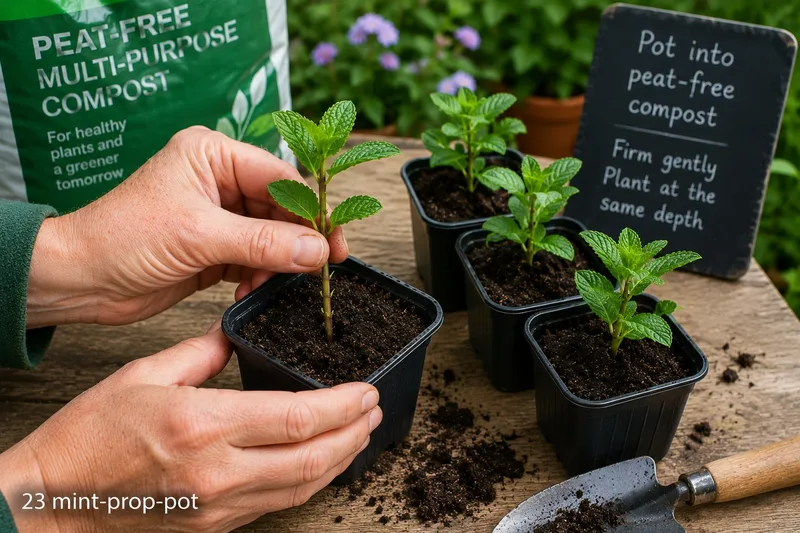
Pot into peat-free compost
Transfer rooted cuttings into individual 9cm pots of peat-free multi-purpose compost. Plant at the same depth as they were in the water. Firm very gently — the new roots are fragile.
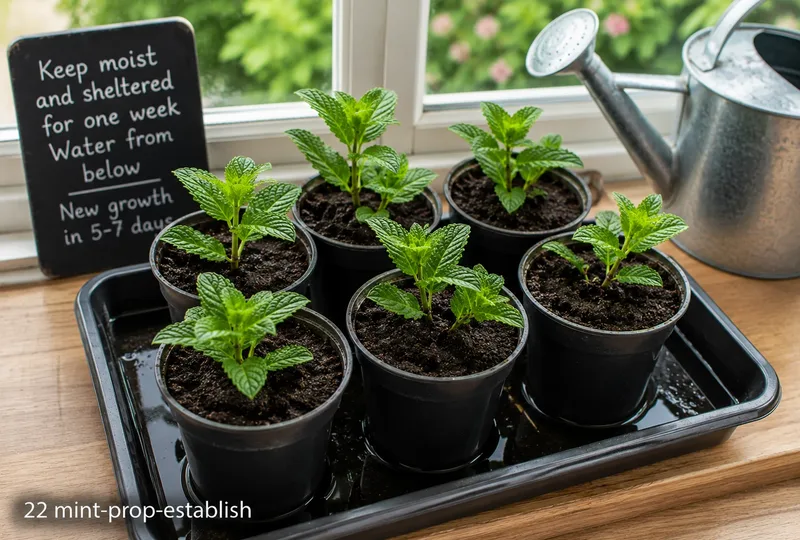
Keep moist and sheltered for one week
Place potted cuttings in a sheltered, bright spot indoors for one week while they adapt from water to soil. Water from below. New aerial growth within 5–7 days confirms successful establishment.
Windowsill alternative: A bright south-facing windowsill can substitute from late February. Place a clear polythene bag loosely over the pot during germination. Remove immediately once seedlings appear.
09 Soil Requirements
pH
6.0–7.0
Best
Loam, Clay loam
Tolerates
Most moist soils
Avoid
Dry sandy, Very acid
💡 Prefers moisture-retentive soil. Grow in containers to prevent spread.
10 Ongoing Care
💧 Watering
Mint is one of the thirstiest herbs in the garden — it wilts dramatically and recovers slowly from drought. Keep compost consistently moist at all times, checking daily in hot weather. In summer, free-standing containers may need watering twice a day. Sunken pots in the ground need much less attention as the surrounding soil retains moisture. Water at the base rather than over the leaves to reduce disease risk.
✂️ Cutting Back
Cut mint stems back to the ground (or to 5cm above soil level) immediately after flowering. This removes the coarse, less flavourful post-flowering stems and triggers a vigorous flush of fresh, tender, highly aromatic new growth within 2–3 weeks. This cut-back can be done 2–3 times per season. In autumn, allow plants to die back naturally and the roots will overwinter and regrow the following spring.
🌱 Annual Division
Divide mint every spring before it becomes congested. Lift or tip out the root mass, discard the woody central section, and replant the vigorous outer runners in fresh compost. A plant left undivided for several years becomes a dense, rootbound mat that produces small, flavourless leaves and is difficult to manage. Division also prevents the plant from exhausting the nutrients in its container.
11 Watch Out For
Warning
Mint rust (orange, powdery pustules on stems and undersides of leaves) can infect plants in humid conditions. Remove and bin all affected material immediately — do not compost. Badly infected plants are best discarded and replaced with fresh cuttings from a healthy source. Do not plant new mint in the same container until the compost has been replaced.
🐛 Insects & pests
🐜 Aphids (Blackfly & Greenfly) — Curled, distorted, or stunted growing tips — aphids inject saliva that causes leaf curl to protect them
🐌 Slugs & Snails — Silver slime trails on leaves, soil, and pots — often the first sign before damage is found
🍄 Diseases to watch
🟠 Rust — Rust diseases are caused by a large family of obligate parasitic fungi, each specific to its host or a narrow range of hosts. Leek rust (Puccinia allii) is the most common in UK vegetable gardens, producing vivid orange pustules on leek leaves in summer and autumn. While rarely fatal, severe infections significantly weaken plants and reduce yields.
🩶 Botrytis (Grey Mould) — Botrytis cinerea (grey mould) is the most ubiquitous fungal pathogen in temperate gardens — present in virtually every garden soil and on plant debris. It becomes a disease only when conditions favour it: cool, humid, poorly ventilated environments with damaged or senescent plant tissue. In a greenhouse in autumn it can destroy an entire tomato or grape crop.
Full identification and treatment advice is in the Pests and Diseases sections.
12 Storage & Preserving
🌿 Fresh (Short Term)
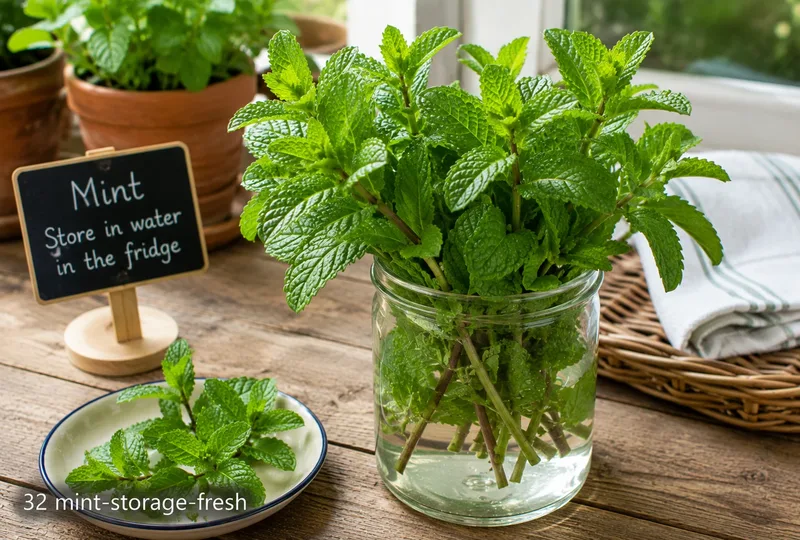
Stand cut mint stems in a glass of cold water on the kitchen worktop — they stay fresh and fragrant for 5–7 days. Alternatively, wrap loosely in a damp paper towel and store in the fridge in a sealed bag for up to a week. Mint deteriorates fastest at the cut end — re-cut the stems and change the water every 2 days for longest life.
☀️ Dried
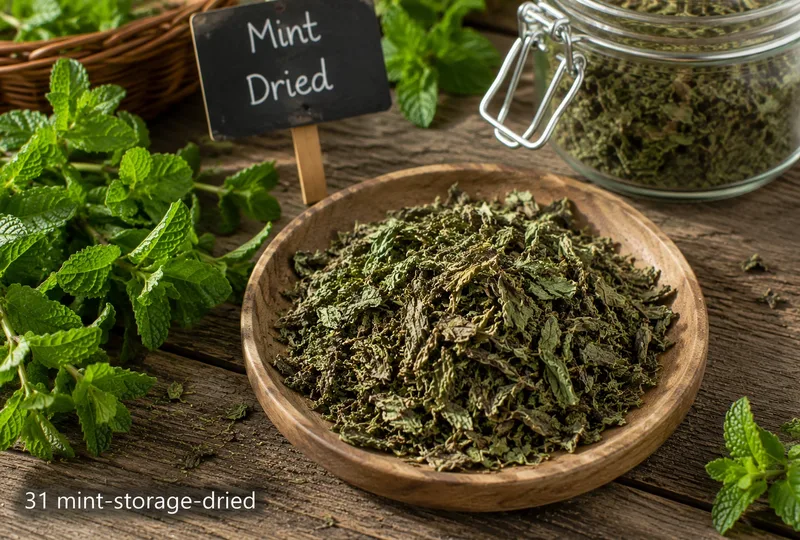
Tie mint stems in small bunches and hang upside down in a warm, dry, airy place out of direct sunlight for 2–3 weeks. Once completely crisp and dry, strip the leaves and store in an airtight jar away from light. Dried mint is excellent in teas, marinades, and Middle Eastern cooking. It retains good flavour for up to one year.
🧊 Frozen
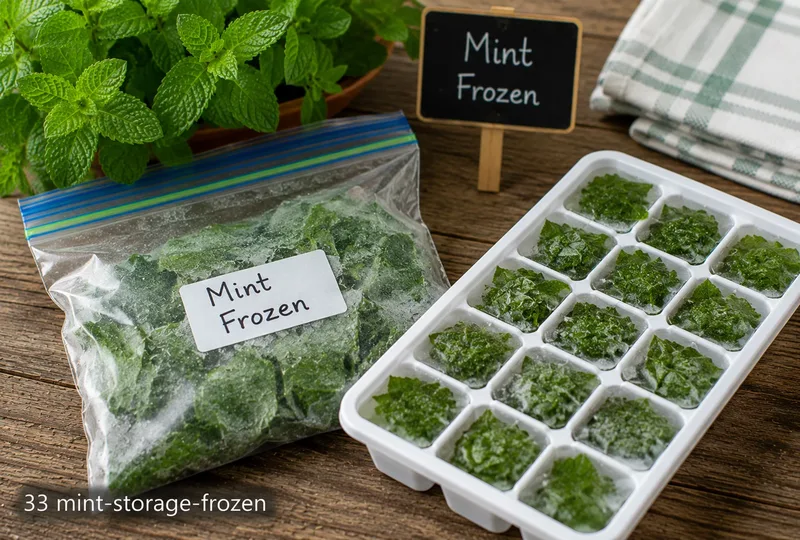
Freeze mint two ways. For mint tea and cooking: freeze whole leaves on a tray, then transfer to a freezer bag — crumble straight into hot water or dishes from frozen. For mojitos and drinks: blend fresh mint leaves with a little water, freeze in ice cube trays, then bag. One cube per drink gives perfect fresh mint flavour even in February.
13 Expert Tips
💡 Grow at least two varieties side by side — the difference in flavour between spearmint, apple mint, and Moroccan mint is remarkable and each suits different uses.
💡 Cut Back in Midsummer
Cut mint to the ground in midsummer even if it has not flowered — the resulting flush of new growth is softer, more aromatic, and more productive than the old stems.
💡 Force Indoors in Winter
Mint can be forced indoors in winter: lift a few roots in November, pot them up, and bring inside. They will produce fresh shoots on a warm windowsill through the coldest months.