Plant in the sunniest, most free-draining spot available — thyme in shade or damp soil produces flavourless, disease-prone growth
Poor or gritty soil is better than rich soil — high fertility produces lush but tasteless growth
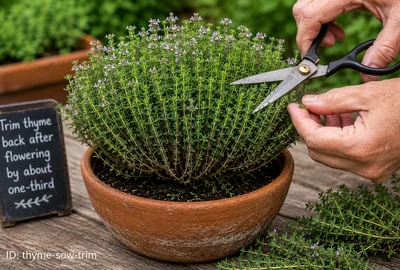
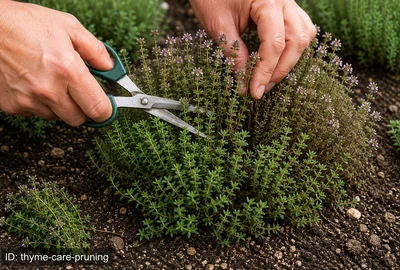
Trim back by one third immediately after flowering each year to prevent woodiness
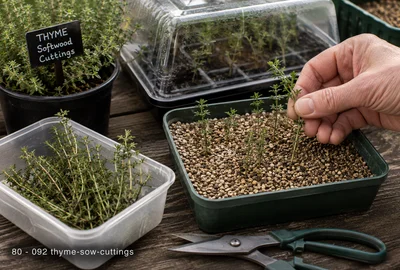
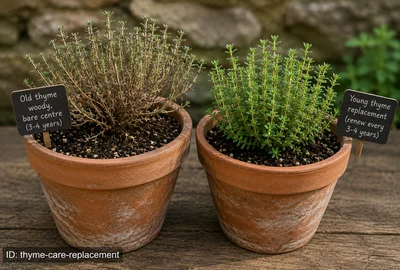
Replace plants every 3–4 years as they become woody — take cuttings in summer to produce replacements
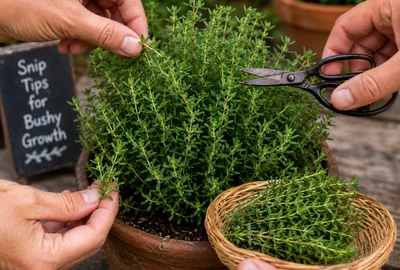
Harvest by cutting shoot tips with scissors — never strip individual leaves
In heavy clay soils, grow in raised beds or terracotta pots with added grit
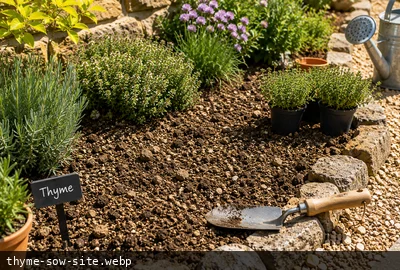
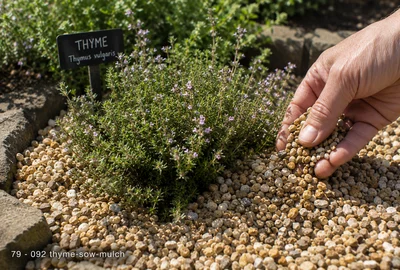
A gravel mulch around the base reflects heat, improves drainage, and reduces disease
🌱 SowBuy as plant, sow Mar–May, or cuttings Jun–Aug
🌾 HarvestYear-round (best May–Sep)
☀ PositionFull sun, well-drained
📐 Spacing30–45cm
DifficultyEasy
⚡ Quick facts
Difficulty
Easy
Start indoors
Mar–May (seed, 15–18°C)
Plant out
May–Jun (when frosts are over)
Harvest
Year-round (best May–September)
Position
Full sun — never part shade
Spacing
30–45cm
Height
15–40cm depending on variety
Type
Hardy perennial (evergreen)
Water
Low — drought-tolerant once established
01 About
Thyme is the most effortless herb in the garden — drought-tolerant, compact, evergreen, and packed with aromatic essential oils that intensify in poor, dry soil and hot sun. A staple of Mediterranean and British cooking alike, it flavours everything from a Sunday roast to a bouquet garni, marinades, and bread. Once established, thyme asks for almost nothing and delivers fresh sprigs year-round, even in the depths of a UK winter.
02 What to Grow
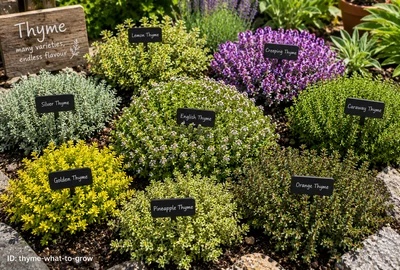
Common thyme is the backbone of herb gardens and kitchens — strong, classic, and endlessly versatile. Lemon thyme adds a bright citrus dimension perfect for fish, chicken, and desserts. Silver Posie is one of the most beautiful ornamental herbs available, with silver-edged leaves and excellent culinary properties. Creeping thyme is a ground-cover plant that releases scent when walked on and produces a carpet of pink flowers loved by bees. Silver Queen (AGM) and Bertram Anderson (AGM) are the two finest ornamental thymes in cultivation, combining outstanding beauty with genuine culinary value.
03 Varieties
The number of varieties shown for each crop is based on UK consumption data (2025/26) — the more popular the crop, the more variety choices we include.
Common Thyme
Culinary · Classic
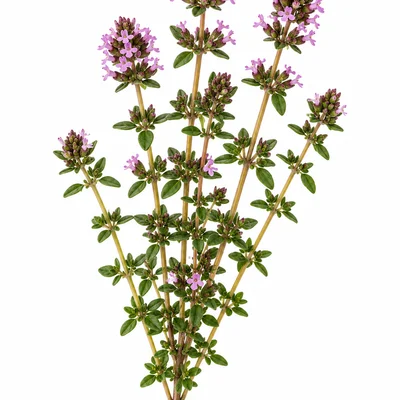
The standard culinary thyme. Strong, classic flavour with warm, aromatic, slightly peppery notes. Essential in bouquet garni, stocks, stews, and roasts. Upright habit, small grey-green leaves, pink-lilac flowers. The most productive variety for kitchen use. The backbone of any herb garden.
Lemon Thyme
Culinary · Citrus
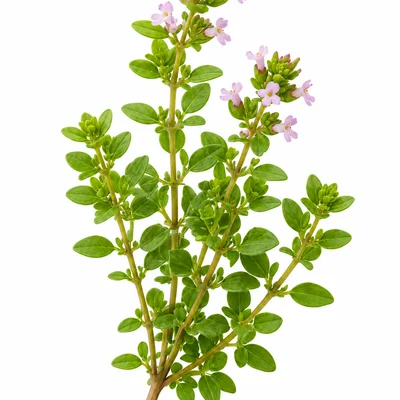
Thymus x citriodorus. A distinct species with a pronounced lemon-citrus fragrance alongside the classic thyme warmth. Outstanding with fish, chicken, salad dressings, and desserts. Slightly less hardy than common thyme but reliably perennial in most UK gardens. Pale pink flowers. One of the most useful culinary herbs available.
Silver Posie
Ornamental · Culinary
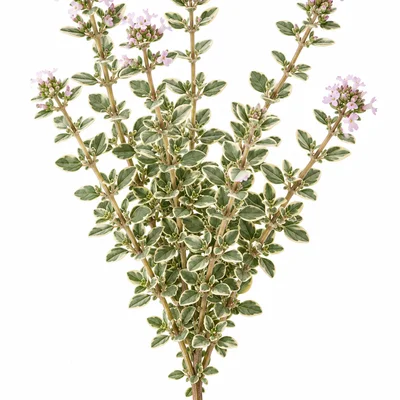
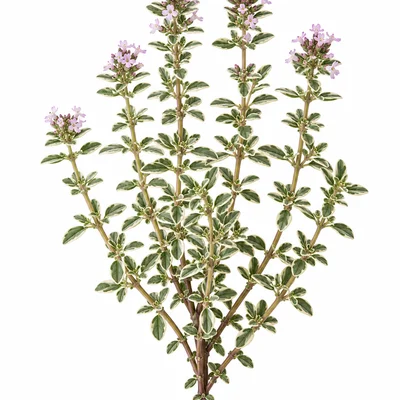
A variegated common thyme with silver-white leaf margins and a compact, mounding habit. Highly ornamental but fully culinary — the flavour is essentially identical to common thyme. One of the prettiest herbs in the kitchen garden. Soft pink flowers. Excellent as a container plant or edging specimen.
Creeping Thyme
Ground Cover · Ornamental
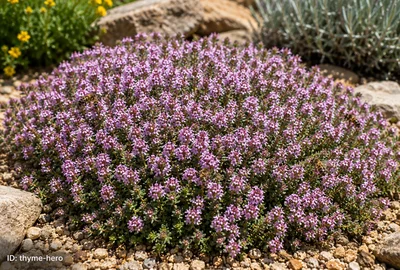
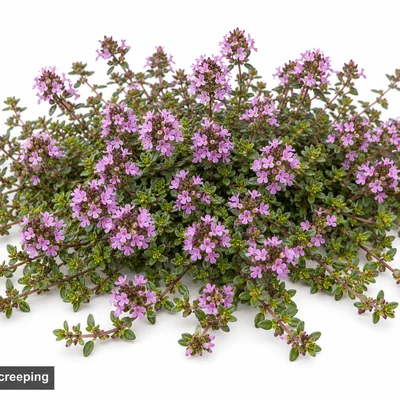
Thymus serpyllum. A prostrate, ground-covering thyme that spreads to 60cm or more. Releases its fragrance intensely when walked upon — the classic choice for planting between paving stones. Covered in tiny pink-purple flowers from June to August. Good culinary properties but mainly grown for ornamental and ground-cover use.
Silver Queen
Ornamental · AGM
RHS Award of Garden Merit. One of the finest ornamental thymes, with clearly defined silver-white leaf margins giving a clean, crisp variegated appearance. Very compact and tidy habit. Excellent culinary properties alongside exceptional ornamental value. A reliable, well-behaved plant that performs consistently in UK gardens. Pink flowers in summer.
AGM
Bertram Anderson
Ornamental · AGM
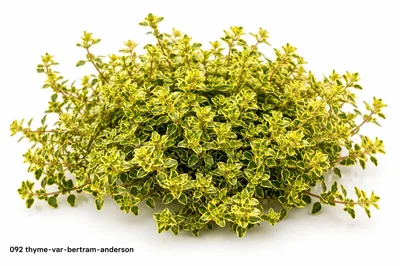
RHS Award of Garden Merit (Thymus pulegioides). A distinctive thyme with gold-flushed leaves that take on stronger yellow tones in good light. Low, spreading habit. Good culinary properties and outstanding ornamental value. The gold colouration contrasts beautifully with silver-leaved forms. Lavender-pink flowers in summer. Very hardy and reliable.
AGM
04 Where to Source
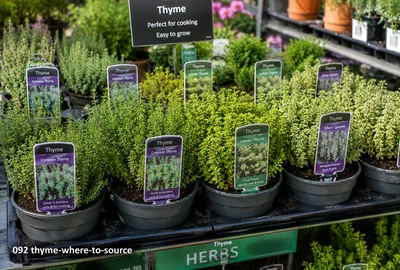
Common thyme and lemon thyme are available as plants from virtually all garden centres from spring onwards. Silver Posie, Silver Queen, and Creeping Thyme are widely stocked by herb specialists. Bertram Anderson is best sought from specialist herb and alpine nurseries. Seed is available for common thyme from most seed suppliers — other varieties do not come true from seed and must be purchased as plants. All thymes can be propagated from cuttings taken in June–August, making it easy to produce replacement plants from a single purchase.
05 Planting Options
🌿 In the Garden Border
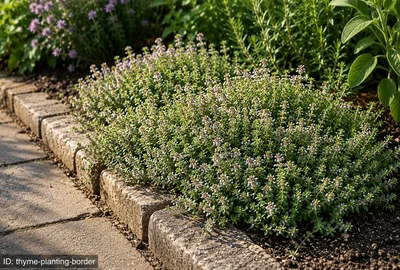
Thyme is at its best in a sunny, free-draining border — particularly on a south-facing slope, against a warm wall, or in a raised bed with gritty soil. It makes an excellent edging plant along paths where brushing past releases the fragrance. Plant 30–45cm apart and allow to spread into a low, fragrant mound.
🪴 In a Container
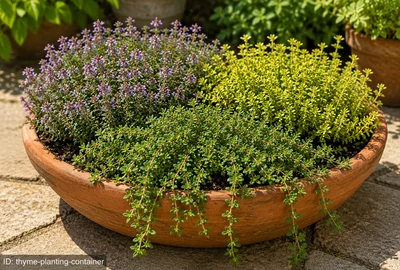
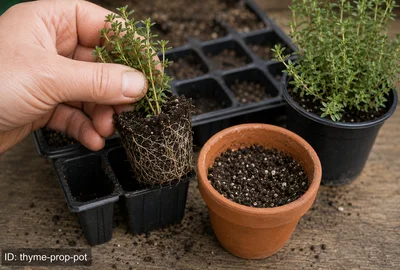
Terracotta pots are ideal for thyme in UK gardens — the porous material improves drainage and warms in sun. Use a very gritty compost mix (50% peat-free compost, 50% horticultural grit). Container thyme needs no feeding and very little watering once established. Move under shelter in the wettest months of winter to prevent root-rot in waterlogged compost.
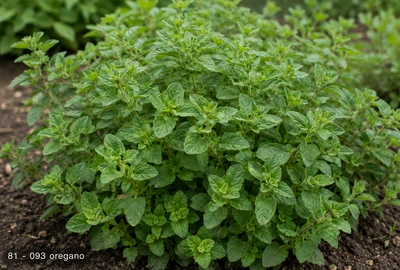
Grows well alongside oregano — both are drought-tolerant and thrive in poor, dry soil.
❌ Keep apart
🌱 Mint — Mint needs consistently moist soil and spreads aggressively, both unsuited to thyme's preference for dry, free-draining conditions.
🌿 Basil — Basil needs regular watering and rich soil, the opposite of thyme's preference for dry, poor, free-draining conditions.
07 Sowing — How To
🪴 From Plants (Recommended)
Choose the right site
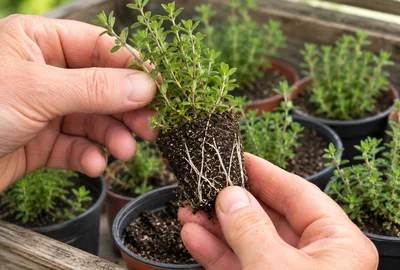
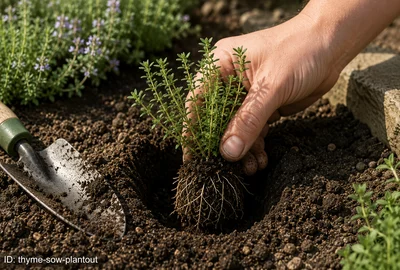
Select the sunniest, most free-draining position available. Against a south-facing wall or fence is ideal. On heavy clay, prepare the area by digging in a generous amount of horticultural grit before planting — poor drainage is the main cause of thyme failure in UK gardens.
Plant at the correct depth
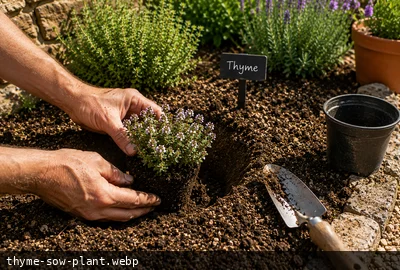
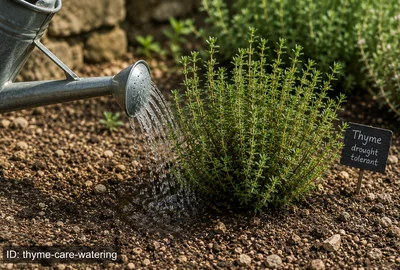
Plant at the same depth as in the pot — do not bury the woody base deeper than it was growing. Firm in well and water once. After the initial watering, allow the soil to dry between waterings to encourage the drought-tolerance thyme naturally develops.
Apply a gravel mulch
Spread a 3–5cm layer of coarse grit or fine gravel around the base of each plant. This improves drainage, reflects heat, reduces slug activity, and gives the plant the Mediterranean microclimate it prefers. Do not use bark or wood chip mulch.
Begin harvesting immediately
Thyme can be lightly harvested from the moment of planting. Cut shoot tips with scissors — never pull individual leaves. Regular light harvesting encourages bushy growth and delays the onset of woodiness.
Trim after first flowering
After the first flush of flowers fades (usually June–July), cut the plant back by one third. This is the most important single maintenance task for thyme — it prevents the plant becoming woody and leggy and extends productive life by years.
Plan for replacement in year 3–4
Take softwood cuttings in June–August while plants are productive. Root in gritty compost in a propagator or cold frame. These become the replacement plants when the original specimens become too woody. One cutting season produces all the plants you will ever need.
From Plants (Recommended) — regional timing
Region
Sow / plant
Harvest
Notes
Scotland & Far North
May–Jun
Jun–Feb
N/A · Plant: May–Jun · Harvest: Jun–Feb
Northern England
Apr–Jun
Apr–Mar
N/A · Plant: Apr–Jun · Harvest: Apr–Mar
Midlands & Wales
Apr–May
Apr–Mar
N/A · Plant: Apr–May · Harvest: Apr–Mar
Ireland & Isle of Man
Apr–May
Apr–Mar
N/A · Plant: Apr–May · Harvest: Apr–Mar
South & SE England
Mar–May
Jan–Dec
N/A · Plant: Mar–May · Harvest: Year-round
South Coast & SW
Mar–Apr
Jan–Dec
N/A · Plant: Mar–Apr · Harvest: Year-round
✂️ From Cuttings
Take softwood cuttings in June–August
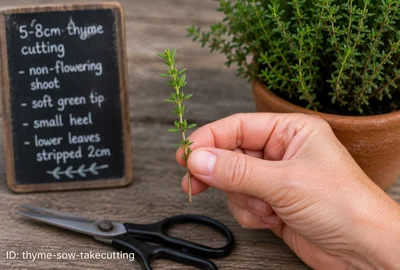
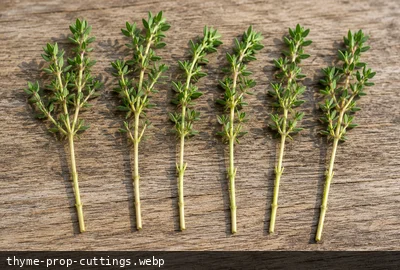
Cut 5–8cm non-flowering shoot tips just below a node using clean, sharp scissors. Take 6–8 cuttings per session — thyme rooting success is good but not 100%. Avoid any shoots with flower buds.
Strip lower leaves
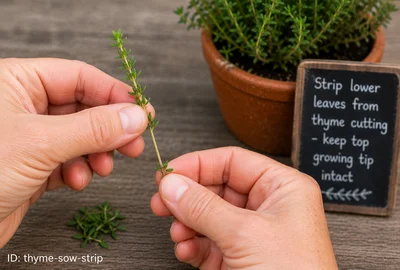
Remove all leaves from the lower half of each cutting, leaving just a few leaves at the tip. Dip the cut end briefly in hormone rooting powder or gel — this genuinely improves rooting speed in thyme.
Insert in gritty compost
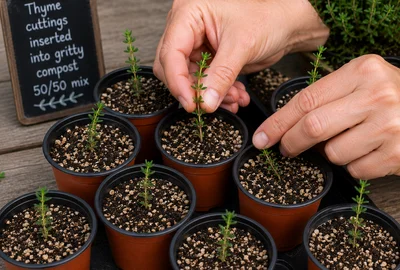
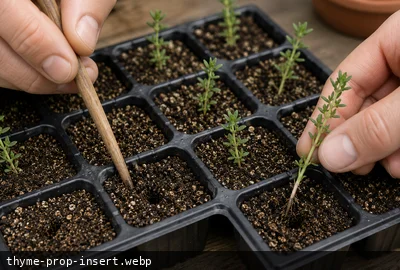
Insert cuttings to half their length around the edge of a 9cm pot filled with 50% compost and 50% horticultural perlite or grit. Firm in gently. Water from below by sitting the pot in a tray.
Keep in a cold frame or propagator
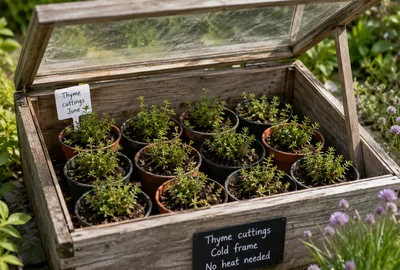
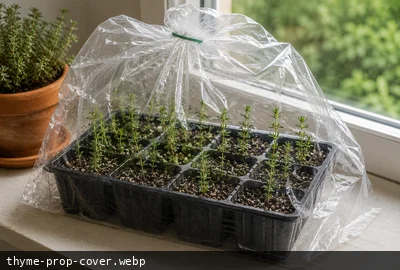
Place in a cold frame or unheated propagator to maintain humidity and protect from wind. Summer cuttings do not need bottom heat. Keep out of direct hot sun which wilts cuttings before they root.
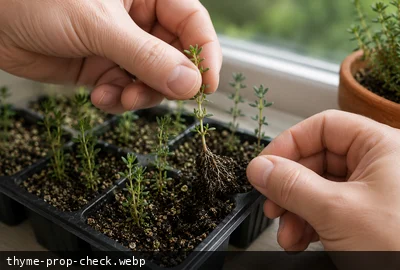
Check for rooting after 3–4 weeks
Tug cuttings gently after 3 weeks. Resistance means roots have formed. Once rooted, pot individually into 9cm pots of gritty compost and grow on in the cold frame until autumn planting.
Plant out in autumn or following spring
September–October is an excellent time to plant rooted thyme cuttings — the soil is still warm and plants establish well before winter. Alternatively, overwinter in the cold frame and plant out in April–May.
From Cuttings — regional timing
Region
Sow / plant
Harvest
Notes
Scotland & Far North
Jun–Sep
—
Jun–Jul · Plant: Aug–Sep · Harvest: Following Apr onwards
Northern England
Jun–Sep
—
Jun–Aug · Plant: Aug–Sep · Harvest: Following Apr onwards
Midlands & Wales
Jun–Sep
Apr
Jun–Aug · Plant: Aug–Sep · Harvest: Apr onwards
Ireland & Isle of Man
Jun–Sep
Apr
Jun–Aug · Plant: Aug–Sep · Harvest: Apr onwards
South & SE England
Jun–Sep
Jan–Dec
Jun–Aug · Plant: Sep · Harvest: Year-round
South Coast & SW
Jun–Sep
Jan–Dec
Jun–Aug · Plant: Sep · Harvest: Year-round
08 Using a Propagator
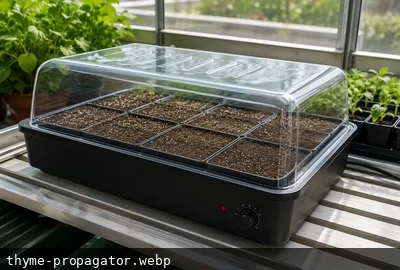
Thyme cuttings root well without bottom heat in summer — a cold frame or sheltered windowsill is entirely adequate for June to August cuttings. A heated propagator is useful only for very early season cuttings (May) or for seed germination in March–April, where a consistent 15–18°C speeds up the rather slow germination of thyme seed.
Unheated propagator
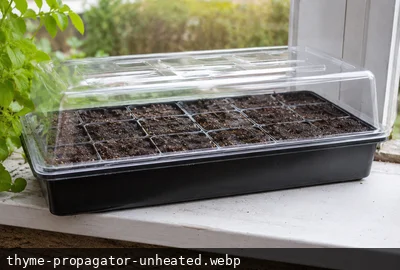
An unheated propagator in a warm position is adequate for cuttings taken from June to August, when ambient temperatures are sufficient for rooting. For seed germination before May, bottom heat gives significantly better results.
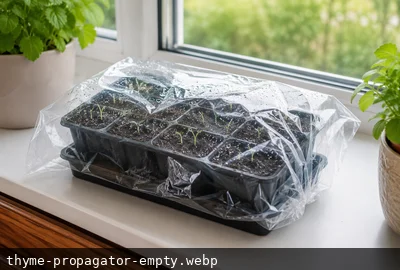
Standard unheated propagator — A lidded seed tray traps warmth and humidity around germinating seeds without electricity. Performance depends entirely on room temperature — best placed on a warm windowsill and used from March onwards. Replace the lid promptly after watering. Remove it completely the moment seedlings emerge to prevent damping off.
Take shoot tip cuttings
Cut 5–8cm non-flowering shoot tips in June–August. Remove lower leaves, leaving just the top 4–6 leaves. Dip in rooting hormone powder for best results.
Insert in gritty compost
Insert around the edge of a 9cm pot of 50:50 compost and perlite. 4–6 cuttings per pot. Firm gently and water from below. Label with variety and date.
Cover with a clear bag
Cover the pot with a clear polythene bag over a wire hoop to maintain humidity without overheating. Place in bright indirect light — avoid direct summer sun which scorches cuttings.
Roots in 3–4 weeks
Tug gently after 3 weeks. Resistance confirms rooting. Remove the bag and allow to grow on in good light for 2–3 weeks before potting individually.
Pot individually and overwinter in cold frame
Pot rooted cuttings into individual 9cm pots of gritty compost. Overwinter in an unheated cold frame — thyme is fully hardy but young rooted cuttings establish better with this protection in their first winter.
Windowsill alternative: A bright south-facing windowsill can substitute from late February. Place a clear polythene bag loosely over the pot during germination. Remove immediately once seedlings appear.
09 Soil Requirements
pH
6.0–8.0
Best
Sandy, Sandy loam, Chalky
Tolerates
Loam
Avoid
Clay, Waterlogged, Rich
💡 Excellent drainage essential. Poor, dry, alkaline soil gives the best flavour.
10 Ongoing Care
✂️ Annual Pruning
Cut thyme back by one third immediately after flowering each year — this is the most critical maintenance task. Never cut into old, brown woody stems without visible new growth below, as thyme does not regenerate from old wood. The cut should be into green, leafy growth. This annual trim prevents the plant becoming a woody, unproductive tangle and extends productive life by several years. Combined with replacement every 3–4 years from new cuttings, it keeps thyme permanently productive.
💧 Watering & Drainage
Once established, thyme in the ground needs watering only in prolonged drought — it is one of the most drought-tolerant plants in the herb garden. Container thyme needs more frequent watering but should always be allowed to dry out between waterings. The greatest enemy of thyme is waterlogging, particularly in winter — wet roots in cold conditions cause root rot and plant collapse within weeks. Perfect drainage is non-negotiable.
🌱 Replacement & Cuttings
Thyme plants become increasingly woody and unproductive after 3–4 years. Take softwood cuttings every 2–3 years in June–August as insurance against plant loss in harsh winters and to maintain a supply of vigorous young plants. A single session of 6–8 cuttings produces all the replacement plants needed. Young plants propagated from your best specimens maintain variety characteristics and are ready to plant out the following spring.
11 Watch Out For
Warning
Thyme is very vulnerable to waterlogging in winter. Even one winter of wet roots can kill an established plant. Ensure perfect drainage at all times — a raised bed, a gravel-topped border, or a terracotta pot with gritty compost is essential in heavy clay soils or areas with high winter rainfall.
🐛 Insects & pests
🕷 Spider Mite — Fine, silky webbing on the underside of leaves and between growing tips — the definitive identification sign
🐜 Aphids (Blackfly & Greenfly) — Curled, distorted, or stunted growing tips — aphids inject saliva that causes leaf curl to protect them
🍄 Diseases to watch
🩶 Botrytis (Grey Mould) — Botrytis cinerea (grey mould) is the most ubiquitous fungal pathogen in temperate gardens — present in virtually every garden soil and on plant debris. It becomes a disease only when conditions favour it: cool, humid, poorly ventilated environments with damaged or senescent plant tissue. In a greenhouse in autumn it can destroy an entire tomato or grape crop.
⬜ Powdery Mildew — Powdery mildew is caused by a range of related fungi, each specific to its host plant — courgette mildew cannot infect peas, and vice versa. The characteristic white powdery coating on leaf surfaces appears in warm, dry conditions (unlike downy mildew which prefers cool and wet). Rarely kills plants but severely reduces yield and plant vigour.
Full identification and treatment advice is in the Pests and Diseases sections.
12 Storage & Preserving
🌿 Fresh (Year-Round)
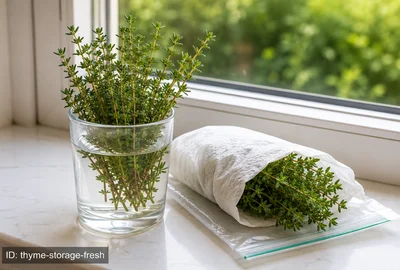
Thyme is an evergreen perennial — fresh sprigs are available directly from the plant year-round, including in winter. For kitchen convenience, cut sprigs can be stored standing in a small glass of water on the worktop for up to a week, or wrapped in a damp paper towel in the fridge for up to 10 days. Fresh thyme has a significantly stronger flavour than dried — use less than you think you need.
☀️ Dried
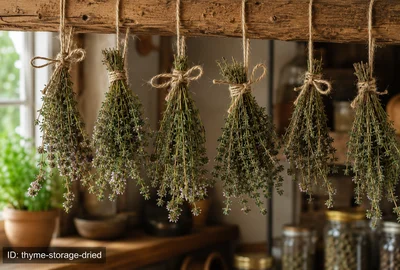
Thyme dries exceptionally well and is one of the best herbs for drying. Tie small bunches and hang upside down in a warm, airy place away from direct light for 2–3 weeks until completely dry. Strip the tiny leaves from the stems and store in an airtight jar. Dried thyme retains good flavour for up to 2 years — far longer than most dried herbs. The ideal time to harvest for drying is just before the flowers open, when essential oil content is highest.
13 Expert Tips
💡 Plant thyme between paving stones on a sunny patio — it tolerates light foot traffic and releases its fragrance every time you brush past.
💡 Harvest Before Flowering
Harvest thyme for drying just before the flowers fully open in June — this is when the essential oil content, and therefore flavour, is at its peak.
💡 Grow Silver Queen and Bertram Anderson side by side — the silver and gold variegation creates a striking ornamental combination that is also fully culinary.