⚡ Quick facts
- Difficulty
- Challenging
- Crop type
- Hardy Biennial grown as Annual
- Position
- Full Sun, Sheltered
- Soil
- Rich, Moisture-Retentive, Well-Drained
- Container friendly
- No — needs deep, moist soil and long season
- Greenhouse recommended
- For germination and early growth only
- Outdoor suitable
- Yes — all UK regions with care
- Frost hardy
- No — cold below 10°C triggers bolting in young plants
01 About
Celery is one of the most demanding crops in the kitchen garden — it requires warmth to germinate, a long growing season, consistent moisture, and feeding — but a home-grown celery head harvested crisp from the garden has a flavour and texture entirely unlike anything sold commercially. Three distinct types exist: trench celery, which is earthed up or collared to blanch the stems white and develop a rich, nutty flavour; self-blanching celery, which needs no earthing up and is planted in blocks so the plants shade each other; and cutting or leaf celery, which is grown for its intensely flavoured leaves rather than its stems. All three reward careful growing with a vegetable of quite exceptional quality.
02 What to Grow
Celery divides into three distinct growing types, each suited to different gardeners and situations. Trench celery is the traditional British type — planted in trenches and progressively earthed up or collared to blanch the stems pure white, producing an intensely rich, nutty flavour quite unlike anything available commercially. Self-blanching types are far easier — planted in blocks so the outer plants shade the inner ones, they produce pale, tender stems without any earthing up. Leaf or cutting celery is the most overlooked type: grown for its finely cut, intensely aromatic leaves rather than its stems, it is extremely productive, far more cold-tolerant than heading types, and can be used as a flavouring herb all season. Choose the type that suits your growing setup — trench for flavour, self-blanching for ease, leaf celery for year-round productivity.
03 Varieties
The number of varieties shown for each crop is based on UK consumption data (2025/26) — the more popular the crop, the more variety choices we include.
🟢 Self-Blanching Celery
The easiest type for UK gardeners — no earthing up or collaring required. Plant in a square block so outer plants shade inner ones. Pale, tender stems with good flavour. Harvest before first frost as these varieties are not frost-hardy.
Victoria F1
Self-Blanching · F1
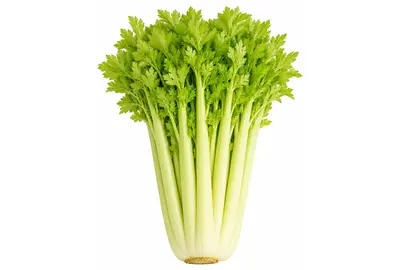
The benchmark self-blanching F1 for UK gardens. Compact, uniform heads with pale cream-green stems and excellent flavour. Outstanding bolt resistance and disease tolerance. The most reliable self-blanching variety available and consistently recommended in independent trials.
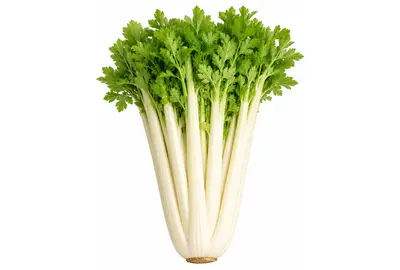
Lathom Self-Blanching
Self-Blanching · Heritage
Reliable heritage self-blanching type with pale cream stems, compact habit, and good flavour. Named for its origins in Lancashire market gardening. Well suited to block planting. A dependable open-pollinated alternative to modern F1 varieties.

Celebrity
Self-Blanching · F1
Modern self-blanching F1 with particularly good disease resistance and uniform, compact stems. Pale green-cream colouring with solid, crisp texture. Good bolt resistance. An excellent choice for gardeners who have had problems with bolting in previous years.
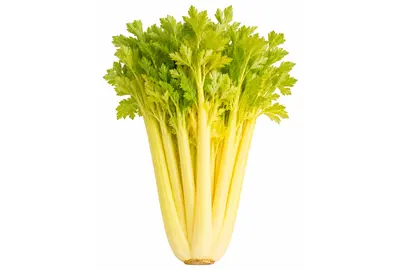
Golden Self-Blanching
Self-Blanching · Heritage
Heritage open-pollinated variety producing naturally golden-yellow stems with a distinctly mild, sweet flavour. One of the oldest UK celery varieties still in cultivation. The golden colouring is natural, not a sign of poor health. Very popular with exhibitors and heritage seed enthusiasts.
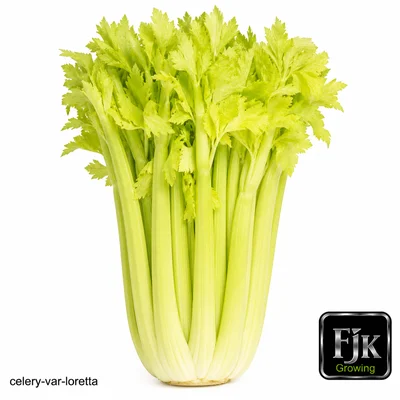
Loretta
Self-Blanching · Seed
A compact, uniform self-blanching celery with pale green-cream stems and reliable performance. Good flavour and bolt resistance. Widely grown commercially and well-suited to block planting. Produces tightly packed stems that blanch effectively through mutual shading.
- Compact
- Uniform
- Good Flavour
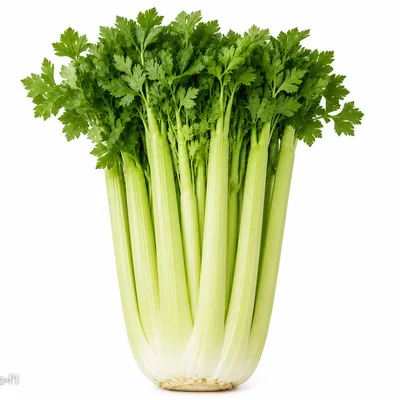
Tango F1
Self-Blanching · F1
An F1 hybrid self-blanching celery with strong yields and excellent uniformity. Mid-green stems with good disease resistance. One of the most reliable commercial-grade varieties now available to home growers. Well-filled heads, long standing ability, and consistently good flavour.
- AGM
- F1 Hybrid
- High Yield
- Disease Resistant
🟤 Trench Celery
Traditional blanching celery grown in trenches and earthed up or collared as stems develop. Produces white, nutty, intensely flavoured stems quite unlike self-blanching types. More work but outstanding flavour. Frost-tolerant once established.
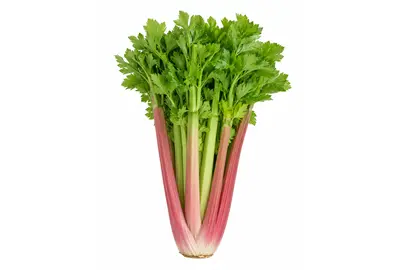
Giant Red
Trench · Heritage
Heritage trench celery with striking pink-red outer stems that turn cream when blanched. Excellent strong celery flavour with good hardiness. One of the most distinctive-looking celery varieties in the garden. The red colouring fades to cream on blanching but provides dramatic appearance before earthing up.
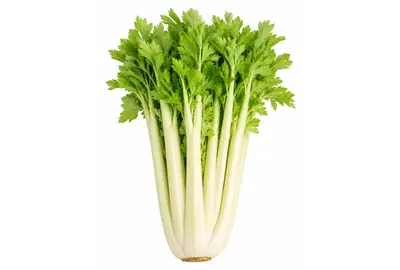
Giant White
Trench · Heritage
Classic large white trench celery with tall, solid, creamy-white blanched stems. Rich, nutty flavour intensified by blanching. A heritage variety that has been grown in British kitchen gardens for generations. Produces large, impressive heads with outstanding keeping quality after harvest.
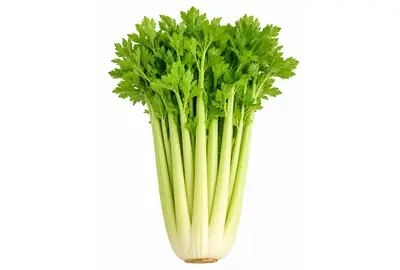
Hopkins Fenlander
Trench · Heritage
Large, vigorous trench celery named for its origins in the Fenland growing tradition. Pale green stems become cream-white when properly blanched. Very good flavour and excellent vigour. One of the most productive trench celery varieties and a reliable performer on heavy, moisture-retentive soils.
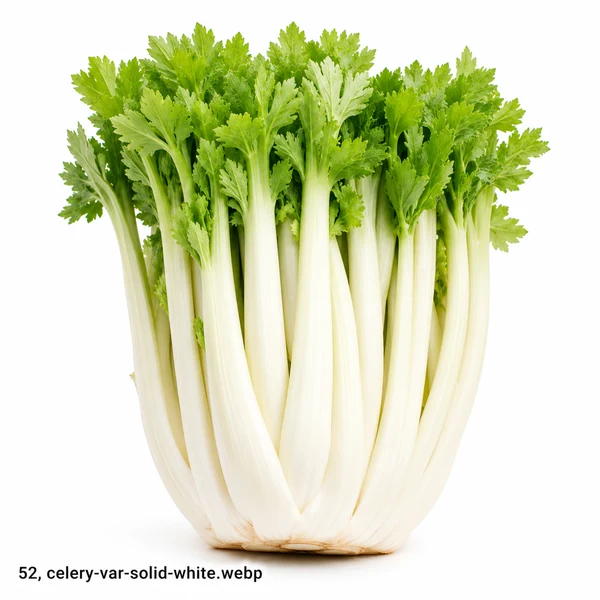
Solid White
Trench · Heritage
Compact trench type with particularly solid, firm, creamy-white blanched stems. The name refers to the exceptional density and solidity of the blanched stalks — no hollowness. Traditional show variety. Excellent for storing and keeping after harvest. Strong, classic celery flavour.
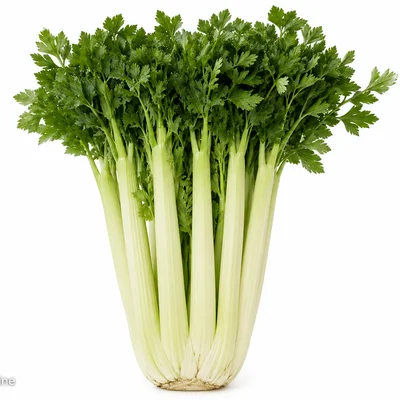
Martine
Trench · Seed
A classic green trench celery with excellent flavour and good disease resistance. Tall, upright growth that responds well to progressive earthing up. Full, rich celery flavour when properly blanched. Reliable performance in UK conditions and good standing ability in the ground.
- Classic Trench
- Rich Flavour
- Disease Resistant

Tall Utah
Trench · Seed
A tall, upright, American-bred trench celery with very uniform straight stems. Compact head with excellent eating quality. Responds well to blanching and produces full flavour when earthed up in the traditional way. Reliable and widely available from heritage seed suppliers.
- Tall
- Uniform
- Classic Heritage
🌿 Leaf & Cutting Celery
Grown for intensely flavoured leaves rather than stems. Cut-and-come-again over many months. Far more cold-tolerant than heading types. Use as a flavouring herb in cooking — the leaves have a concentrated celery flavour far stronger than heading types.
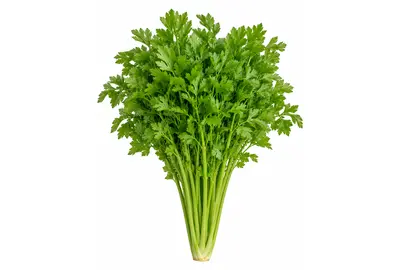
Par-Cel
Leaf Celery · Heritage
The classic leaf celery — a cross between celery and parsley in appearance, with finely cut, dark green leaves on slender stems. Intensely aromatic with a complex, rich celery flavour. Cut-and-come-again over a very long season. Historically used as both a flavouring herb and a salad leaf. Very cold-tolerant.
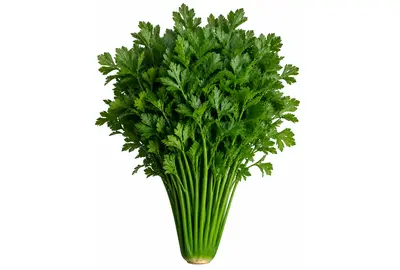
Amsterdam
Leaf Celery · Heritage
Dutch heritage cutting celery with upright, fine-stemmed growth and strongly aromatic dark green leaves. Very productive over a long season. The leaves are more strongly flavoured than Par-Cel with a deeper, more savoury note. Excellent for flavouring soups, stocks, stews, and sauces throughout autumn and winter.
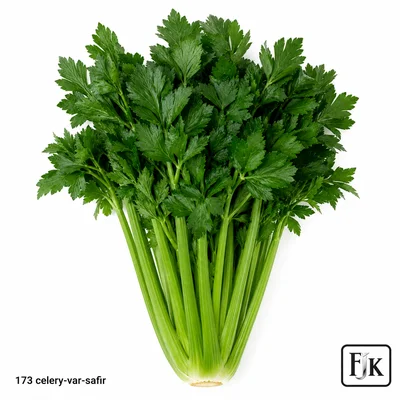
Safir
Leaf Celery · Modern
Compact, leafy cutting celery with very dark green, intensely flavoured leaves. More cold-tolerant than self-blanching varieties — will continue producing through mild UK winters under fleece. Bred specifically for leaf production rather than stem development. The most cold-hardy of the leaf celery types.

Zwolsche Krul
Leaf Celery · Heritage
A Dutch cutting celery with beautifully curled, finely divided leaves in the style of curled parsley. Intensely aromatic. Used as a herb throughout the season — chop fresh over soups, stews, and salads. Very productive from multiple cuts all season long.
- Curled Leaf
- Herb-Like
- Very Productive
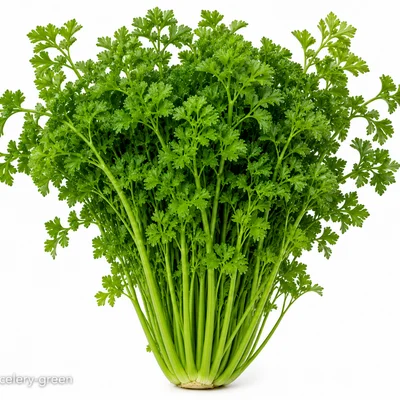
Leaf Celery Green
Leaf Celery · Modern
A flat-leaved cutting celery grown for its intensely aromatic dark green foliage. More cold-hardy than heading types and productive into autumn. Use exactly as a herb in stocks, soups, and as a garnish. One plant provides continuous leaf harvest all season long.
- Cut & Come Again
- Cold Hardy
- Year-Round
Darklet
Leaf Celery · Modern
A very dark-leaved cutting celery with intensely aromatic, almost black-green foliage. Exceptionally cold-hardy — will continue producing leaves through mild UK winters under cloche or fleece. One of the most productive leaf celeries for year-round use. Strong, concentrated celery flavour.
- Very Cold Hardy
- Very Dark
- Year-Round
04 Where to Source
Celery seed is available from all major UK seed companies. Self-blanching F1 varieties such as Victoria are widely stocked; trench varieties including Giant Red and Giant White are best sought from specialist heritage seed companies. Plug plants are occasionally available from garden centres in May — these are useful if you miss the sowing window but are almost always self-blanching types only. Leaf celery seed is most reliably found through specialist herb and vegetable seed companies.
05 Planting Options
🌿 Open Ground
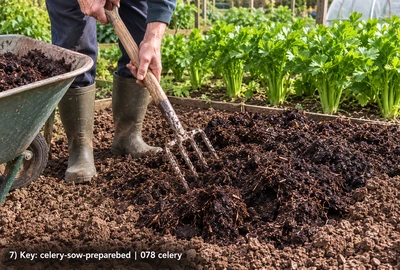
The standard method for trench and self-blanching celery. Prepare the bed deeply, incorporating generous amounts of well-rotted compost or manure — celery is a hungry, thirsty crop that needs rich, moisture-retentive soil. For self-blanching types, plant in a square block (not rows) at 25–30cm spacing in each direction so plants shade each other naturally. For trench types, plant 30cm apart and begin earthing up or collaring stems as they grow.
Suitable varieties: All celery types. Trench varieties benefit from a traditional sunken trench preparation.
🪵 Raised Bed
Raised beds suit self-blanching and leaf celery well — the improved drainage prevents waterlogging while the deeper soil retains moisture. Enrich the bed heavily with compost before planting. Self-blanching celery planted in a tight block in a raised bed performs particularly well. Trench celery is less suited to raised beds as the earthing-up process is more difficult.
Suitable varieties: Self-blanching and leaf celery. Less suited to traditional trench varieties.
06 Companion Planting
✅ Grow nearby
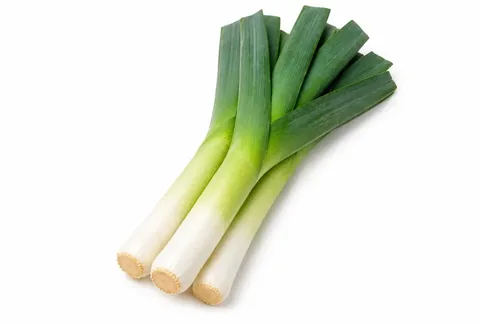
Traditional companions. Leeks deter carrot fly, which also attacks celery. The combination makes efficient use of moist, fertile soil that both crops require.
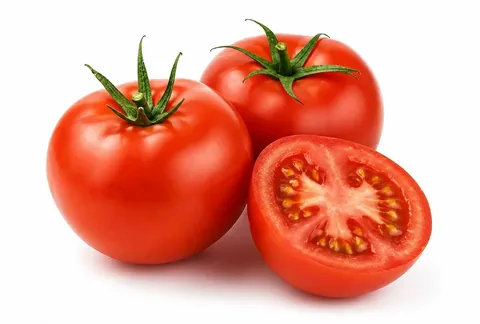
Tomatoes and celery are said to deter each other's pests. Growing in adjacent beds is the traditional recommendation — close enough to benefit, far enough to avoid competition for the same nutrients.
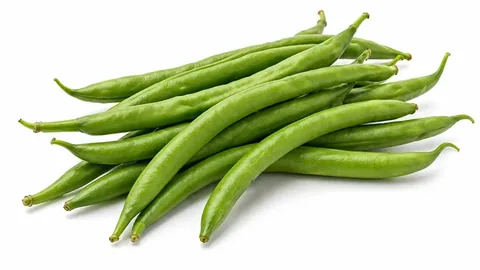
Dwarf or climbing beans provide light shade that helps keep the soil moist around celery roots in hot summer weather, reducing the watering burden on this thirsty crop.
❌ Keep apart
- 🥕 Parsnips — Celery and parsnips share the same family (Apiaceae) and attract the same pests and diseases. Rotating them together defeats the purpose of crop rotation — always separate them in the rotation plan.
- 🥕 Carrots — As with parsnips, growing celery near carrots concentrates carrot-fly pressure on both crops. Keep all Apiaceae family members together in the rotation, away from each other's previous growing sites.
07 Sowing — How To
🌱 From Seed (Indoors)
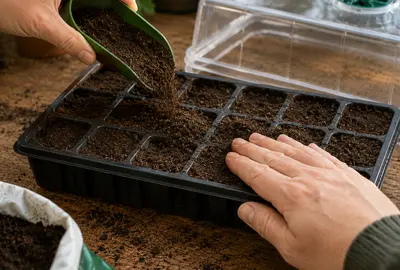
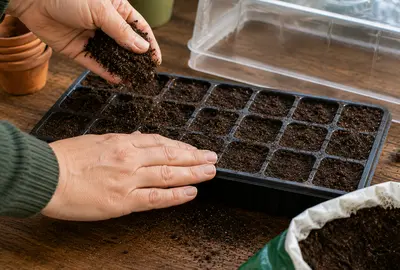
Fill the tray with compost
Fill a seed tray or module tray with fine seed compost, firm lightly, and water well before sowing. The compost surface should be level and evenly moist. Celery requires warmth — set up in a heated propagator or the warmest room available before filling.
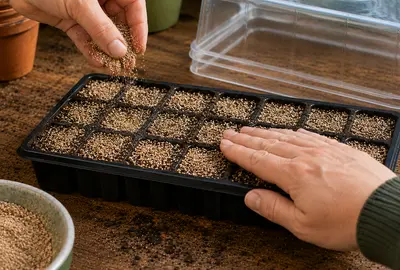
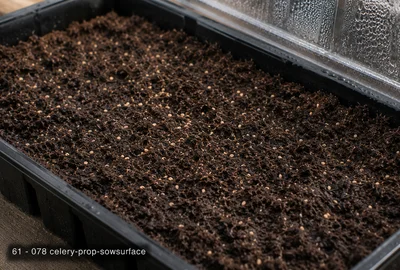
Sow on the surface
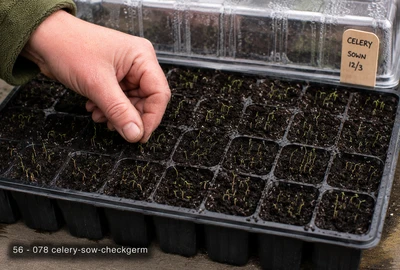
Scatter celery seeds very thinly on the surface of the compost. Do not cover — celery seeds are tiny and need light to trigger germination. Covering them even lightly with compost will significantly reduce germination rates. A few seeds per module is sufficient.
Cover and propagate
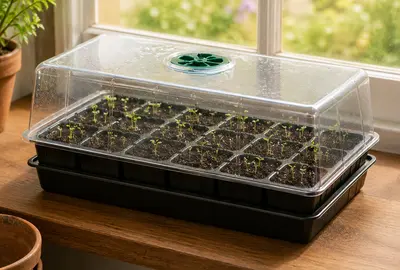
Place a sheet of glass or cling film over the tray and put inside a propagator set to 15–18°C. Celery is one of the slowest and most temperature-sensitive crops to germinate — it takes 2–3 weeks and will not germinate reliably below 15°C. Patience is essential.
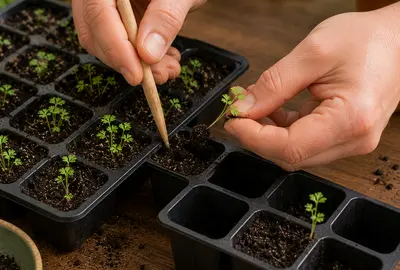
Prick out carefully
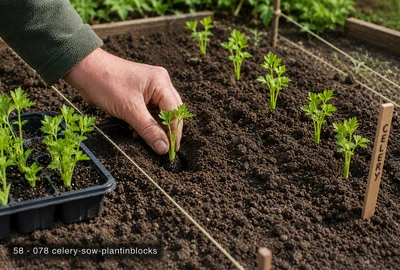
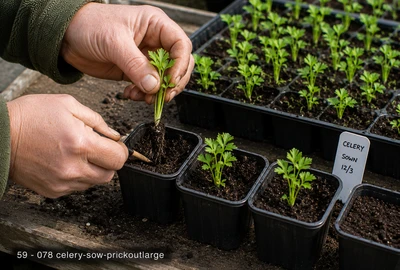
When seedlings are large enough to handle — usually when they have their first pair of true leaves — prick out individually into module cells or small pots using a fine dibber. Handle seedlings by their leaves, never by the stems. The seedlings are tiny and fragile at this stage.
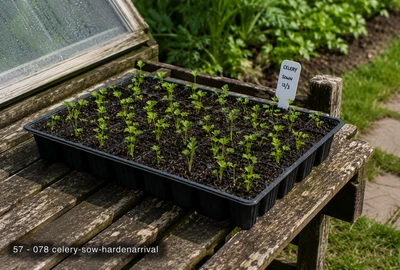
Grow on and harden off
Grow plants on in good light at 15°C minimum. Never expose to temperatures below 10°C — cold vernalisation causes premature bolting. Harden off very gradually over 2–3 weeks from late May by taking plants outside only on warm, still days. Never leave out overnight until nights are reliably above 10°C.
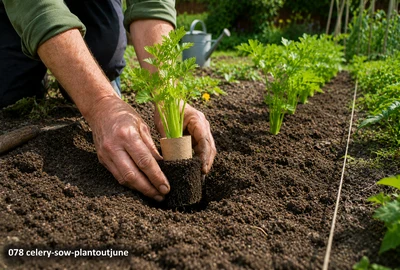
Plant out in June
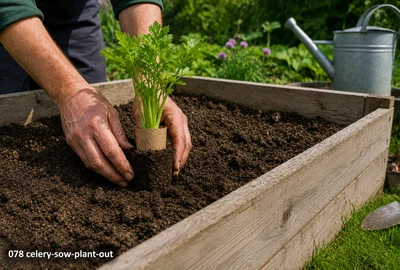
Plant out into deeply prepared, compost-enriched soil in June when all risk of cold nights has passed. Space self-blanching types 25–30cm in a block; trench types 30–35cm in rows. Firm in well, water thoroughly, and apply a mulch of compost around each plant to retain moisture.
From Seed (Indoors) — regional timing| Region | Sow / plant | Harvest | Notes |
|---|
| Scotland & Far North | Feb–Mar | Jun–Sep | Feb–Mar indoors · Plant: Jun · Harvest: Sep–Oct |
|---|
| Northern England | Feb–Mar | Jun–Oct | Feb–Mar indoors · Plant: Jun · Harvest: Sep–Oct |
|---|
| Midlands & Wales | Feb–Apr | Jun–Oct | Feb–Apr indoors · Plant: Jun · Harvest: Aug–Nov |
|---|
| Ireland & Isle of Man | Feb–Apr | Jun–Oct | Feb–Apr indoors · Plant: Jun · Harvest: Aug–Nov |
|---|
| South & SE England | Feb–Apr | May–Oct | Feb–Apr indoors · Plant: May–Jun · Harvest: Aug–Nov |
|---|
| South Coast & SW | Feb–Apr | May–Nov | Feb–Apr indoors · Plant: May–Jun · Harvest: Aug–Nov |
|---|
🪴 From Plug Plants
Source healthy plugs
Plug plants are occasionally available from garden centres in May. Check they are stocky and dark green — not pale, drawn, or pot-bound. Nearly all plug celery sold is self-blanching type. If you want trench varieties, growing from seed is the only reliable option.
Harden off on arrival
Do not plant straight out. Harden off any plug plants that have been grown under glass for at least one week before planting. Set outside during warm days, bring in at night. Cold exposure below 10°C at this stage triggers bolting — be vigilant with overnight temperatures in May.
Prepare the bed
Prepare a richly composted bed with excellent moisture retention. Dig in a generous layer of well-rotted compost or manure. Celery is one of the most demanding crops in terms of soil preparation — poor soil produces hollow, bitter, stringy stems regardless of subsequent care.
Plant in blocks
For self-blanching celery, plant in a square block rather than rows — the outer plants shade the inner ones, producing naturally pale stems. Space 25–30cm in each direction. Firm in well and water thoroughly immediately after planting.
Water in and mulch
Water in thoroughly and apply a 5cm mulch of well-rotted compost or straw around each plant. Mulch is essential for celery — it retains the consistent moisture the crop requires and prevents soil capping in dry weather. Keep the mulch away from direct contact with stems.
Begin feeding at 2 weeks
Start feeding with a balanced liquid fertiliser two weeks after planting, once plants are growing away strongly. Feed every 2 weeks throughout the growing season. Celery requires consistent nutrition — irregular feeding produces uneven, hollow stems.
From Plug Plants — regional timing| Region | Sow / plant | Harvest | Notes |
|---|
| Scotland & Far North | Jun | Jun–Sep | N/A · Plant: Jun · Harvest: Sep–Oct |
|---|
| Northern England | Jun | Jun–Oct | N/A · Plant: Jun · Harvest: Sep–Oct |
|---|
| Midlands & Wales | May–Jun | Jun–Oct | N/A · Plant: May–Jun · Harvest: Aug–Nov |
|---|
| Ireland & Isle of Man | May–Jun | Jun–Oct | N/A · Plant: May–Jun · Harvest: Aug–Nov |
|---|
| South & SE England | May–Jun | May–Oct | N/A · Plant: May–Jun · Harvest: Aug–Nov |
|---|
| South Coast & SW | May–Jun | May–Nov | N/A · Plant: May–Jun · Harvest: Aug–Nov |
|---|
08 Using a Propagator
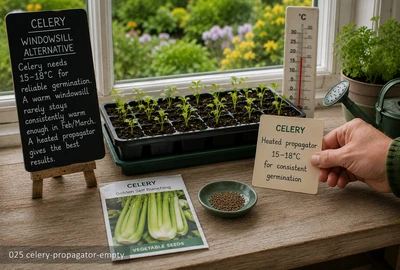
Celery is one of the crops where a heated propagator makes a genuine and significant difference. Germination requires a consistent 15–18°C — a temperature difficult to maintain reliably on most UK windowsills, particularly in February and March when sowing should begin. Without bottom heat, germination rates are poor and erratic. A thermostatically controlled propagator set to 18°C gives consistently fast, even germination.
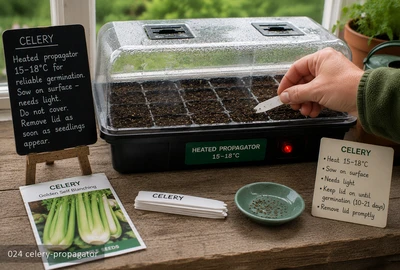
Heated propagator
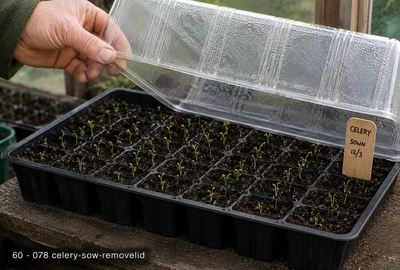
Set to 15–18°C for reliable germination. Sow seeds on the surface of moist compost — celery needs light to germinate so do not cover. Keep the lid on until seedlings appear (10–21 days). Remove promptly once germination begins to prevent damping off.
Temperature: 15–18°C
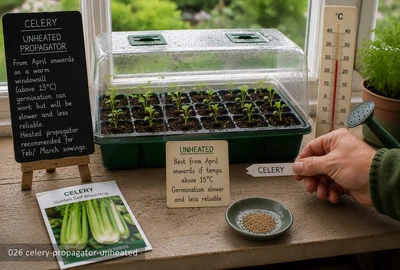
Unheated propagator
An unheated propagator on a warm windowsill (above 15°C) can work from April onwards but germination will be slower and less reliable. For February and March sowings, a heated propagator is strongly recommended.
Standard unheated propagator — A lidded seed tray traps warmth and humidity around germinating seeds without electricity. Performance depends entirely on room temperature — best placed on a warm windowsill and used from March onwards. Replace the lid promptly after watering. Remove it completely the moment seedlings emerge to prevent damping off.
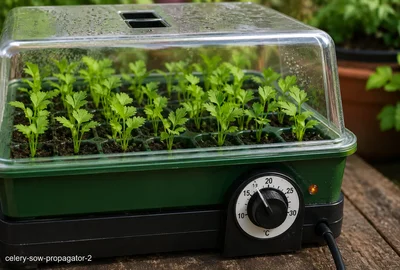
Set propagator to 18°C
Set the propagator thermostat to 18°C and allow it to reach temperature before sowing. Pre-warming the compost inside the propagator for 30 minutes before sowing ensures seeds are not placed onto cold substrate, which significantly delays germination.
Scatter under cover
Once the propagator is up to temperature, scatter celery seeds thinly across the moist compost surface inside it. Do not cover — light is essential for germination. Close the lid gently and keep the propagator on a bright windowsill so light reaches the seeds through the cover.
Check daily for germination
Check daily from day 10. Germination at 18°C typically takes 14–21 days — celery is genuinely slow. Do not be tempted to disturb or re-sow before 3 weeks. Once the first seedlings appear, open propagator vents to begin increasing air circulation around emerging seedlings.
Remove lid on germination
Once most seedlings have emerged, remove the propagator lid entirely. Move to a bright windowsill maintaining a minimum of 15°C. Do not return to the propagator — the higher humidity encourages damping off disease in established seedlings. Keep the temperature above 10°C at all times.
Prick out when large enough
Prick out seedlings into individual modules when they have their first true leaves — typically 3–4 weeks after germination. Handle by the leaves with a fine dibber. Grow on in good light at 15°C minimum until hardening off begins in late May.
Windowsill alternative: A bright south-facing windowsill can substitute from late February. Place a clear polythene bag loosely over the pot during germination. Remove immediately once seedlings appear.
09 Soil Requirements
- pH
- 6.5–7.5
- Best
- Loam, Clay loam
- Tolerates
- Sandy loam
- Avoid
- Sandy, Waterlogged, Acid, Dry
💡 Needs deep, consistently moist fertile soil. Very sensitive to drought.
10 Ongoing Care
💧 Watering
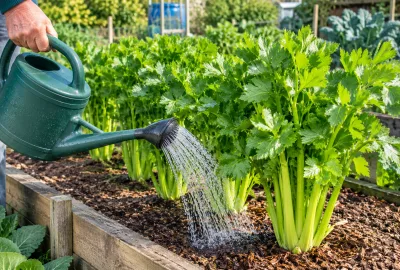
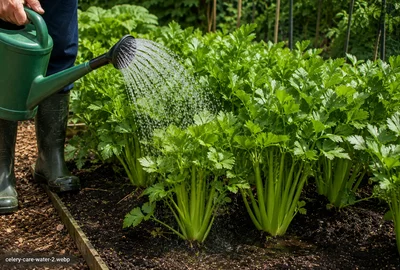
Celery requires more water than almost any other vegetable in the garden — it evolved in wet meadows and marshes and never adapted to drought. Water generously and consistently throughout the growing season, aiming to keep the soil evenly moist at all times. In dry weather, established plants may need watering every 2–3 days. Allow the soil to dry out even briefly and the result is hollow, pithy, bitter stems — a problem that cannot be reversed once it occurs. Soaker hoses or drip irrigation make consistent watering much easier for a long-season crop like celery. Apply a generous mulch of compost around plants to reduce evaporation between watering.
🌱 Feeding
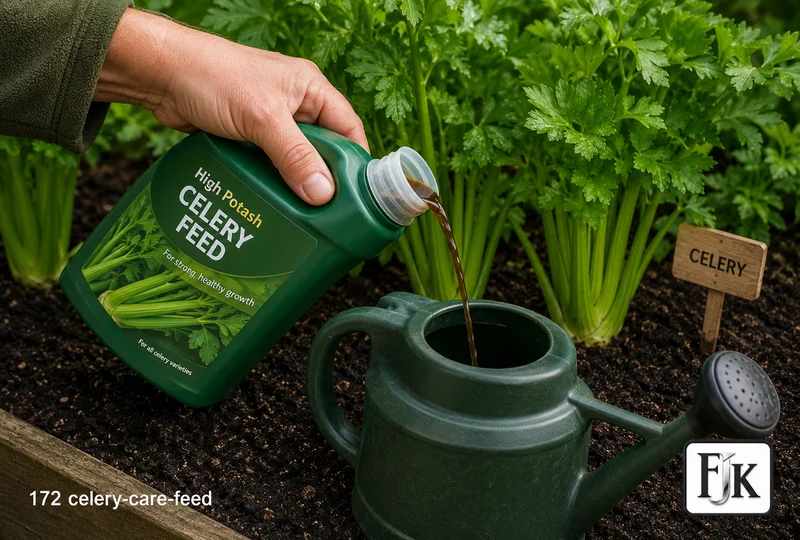
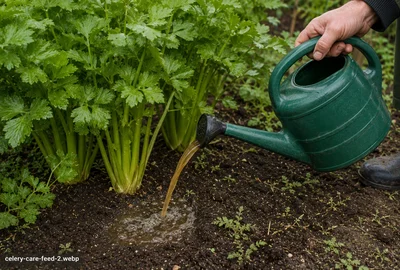
Feed every two weeks throughout the growing season with a balanced liquid fertiliser. Celery is a long-season crop that exhausts soil nutrients over its 4–5 month growing period. A balanced feed (equal NPK) supports both stem and leaf development. Switch to a slightly higher nitrogen feed in midsummer if plants show pale colouring or slow growth. Do not over-feed with high-nitrogen fertilisers as this produces lush but structurally weak stems prone to cracking and disease. Apply feed directly to the soil at the base of plants, never onto the foliage.
✂️ Blanching & Harvesting
For trench celery, begin blanching when plants are 30cm tall by wrapping stems with cardboard collars, newspaper, or purpose-made celery sleeves, excluding all light from the lower stems. Earth up around the outside of the collar progressively as plants grow. Blanching takes 3–4 weeks and produces the characteristic white, nutty stems of traditional trench celery. For self-blanching types, plant in a block and the outer plants will shade inner ones naturally — no collaring needed. Harvest by cutting the whole head at soil level with a sharp knife when stems are well-developed and before hard frost. Self-blanching celery is not frost-hardy; trench celery tolerates moderate frost.
11 Watch Out For
WarningCelery leaf miner creates blistered, browning foliage from June onwards — pick off affected leaves promptly and cover with fine mesh from planting. Slugs attack young transplants relentlessly; use nematode drench at planting and repeat monthly. Celery mosaic virus causes mottled, distorted foliage with no cure — remove affected plants immediately and control aphid vectors. Boron deficiency causes cracked, brown-tinged stems in sandy soils — apply a dilute borax solution if this appears.
🐛 Insects & pests
- 🪰 Carrot Root Fly — Reddish-brown rusty tunnels running through the outside of carrot and parsnip roots — larval feeding channels
- 🐌 Slugs & Snails — Silver slime trails on leaves, soil, and pots — often the first sign before damage is found
- 🐜 Aphids (Blackfly & Greenfly) — Curled, distorted, or stunted growing tips — aphids inject saliva that causes leaf curl to protect them
- 🌿 Leaf Miner — Pale, winding tunnels or irregular blotches between leaf surfaces — visible when held up to light
🍄 Diseases to watch
- ⬜ Sclerotinia (White Mould) — Sclerotinia sclerotiorum causes a sudden, dramatic collapse of apparently healthy plants. It produces dense white cotton-wool-like mycelium and large black resting bodies (sclerotia) that persist in soil for up to 10 years. A single severely affected bed can remain a reservoir for re-infection for a decade.
- 🩶 Botrytis (Grey Mould) — Botrytis cinerea (grey mould) is the most ubiquitous fungal pathogen in temperate gardens — present in virtually every garden soil and on plant debris. It becomes a disease only when conditions favour it: cool, humid, poorly ventilated environments with damaged or senescent plant tissue. In a greenhouse in autumn it can destroy an entire tomato or grape crop.
Full identification and treatment advice is in the Pests and Diseases sections.
12 Harvesting
🔪 Cut at the Base
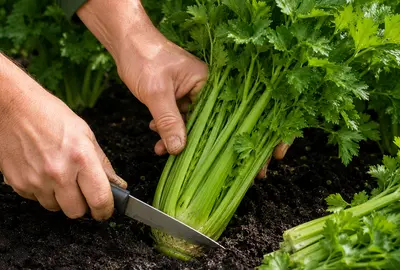
Cut the whole head at soil level with a sharp knife once stalks are a usable size, rather than pulling — cutting avoids disturbing neighbouring plants. Self-blanching celery is usually ready from midsummer; trench types are hardier and can be lifted through autumn and into winter.
13 Storage & Preserving
🧊 Refrigerator Storage
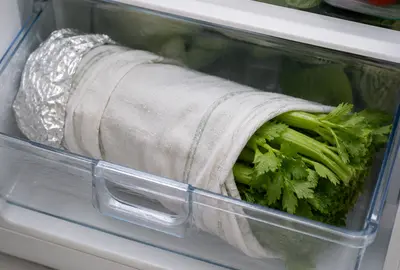
Wrap whole celery heads or individual sticks in a damp cloth or damp paper towel, then wrap loosely in foil. Store in the salad drawer of the refrigerator. Kept this way, celery remains crisp for up to 2 weeks. The damp wrapping is essential — celery is almost entirely water and loses crispness rapidly in the dry atmosphere of a refrigerator without it. Do not store celery near apples or pears, which emit ethylene gas that causes premature browning.
💧 Celery in Water
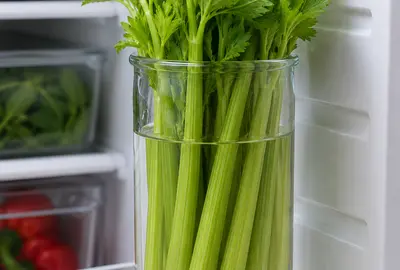
For individual sticks or trimmed celery, stand upright in a glass or jar of cold water in the refrigerator. The stems rehydrate and remain crisp for up to a week. This is the ideal method for prepared celery sticks ready for snacking or cooking. Change the water every 2 days. Celery stored this way actually improves in crispness compared to freshly harvested — the water firms the cellular structure of the stems significantly.
❄️ Freezing
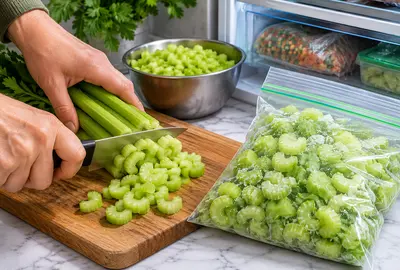
Celery does not freeze well for eating raw — it loses its crunch completely. However, it freezes excellently for cooking: chop into 1–2cm pieces, blanch in boiling water for 3 minutes, plunge into ice water, drain, dry thoroughly, and freeze in portions in sealed bags. Frozen celery keeps for 6 months and is ideal for soups, stocks, stews, and casseroles where texture is less important than flavour. Label bags with the date — frozen celery is indistinguishable from fresh once thawed.
14 Expert Tips
💡 The single biggest mistake with celery
The single biggest mistake with celery is rushing it outdoors too early. One cold night below 10°C on a young plant causes vernalisation — the plant thinks it has experienced winter and will bolt to seed rather than producing stems. Wait until nights are reliably above 10°C, which in most of the UK means mid-June rather than May, regardless of what the weather looks like.
💡 Self-blanching celery planted in a proper
Self-blanching celery planted in a proper square block — not rows — blanches far better than in rows, because the plants on all four sides shade the central ones. A block of 16 plants (4×4) at 25cm spacing produces much better-quality inner stems than the same plants in two rows of 8. This single adjustment makes self-blanching types genuinely self-blanching rather than just pale green.
💡 Leaf celery (cutting celery) is the
Leaf celery (cutting celery) is the most underrated kitchen garden plant most UK gardeners have never tried. It is grown exactly like flat-leaf parsley, produces intensely flavoured celery leaves all season, tolerates cold far better than heading types, and can be harvested continuously as a cut-and-come-again crop from June to November. A single plant provides more celery flavour than three full-sized self-blanching heads.
15 Common Mistakes
⚠ Sowing & Early Care
- Covering the seeds — celery seeds need light to germinate; even a thin covering of compost dramatically reduces germination rates
- Exposing young plants to cold — temperatures below 10°C cause premature bolting; never rush hardening off or planting out
⚠ Ongoing Care
- Inconsistent watering — allowing the soil to dry out even once produces hollow, pithy, bitter stems that cannot be recovered
- Forgetting to feed — celery over a 4–5 month season exhausts soil nutrients; without fortnightly feeding stems become stringy and pale
⚠ Harvest & Storage
- Leaving self-blanching celery out after the first frost — it is not frost-hardy and will be destroyed; trench types tolerate moderate frost but should be harvested before hard freezes
- Harvesting too early — celery needs its full season; stems harvested before they are properly developed are thin, hollow, and lack flavour